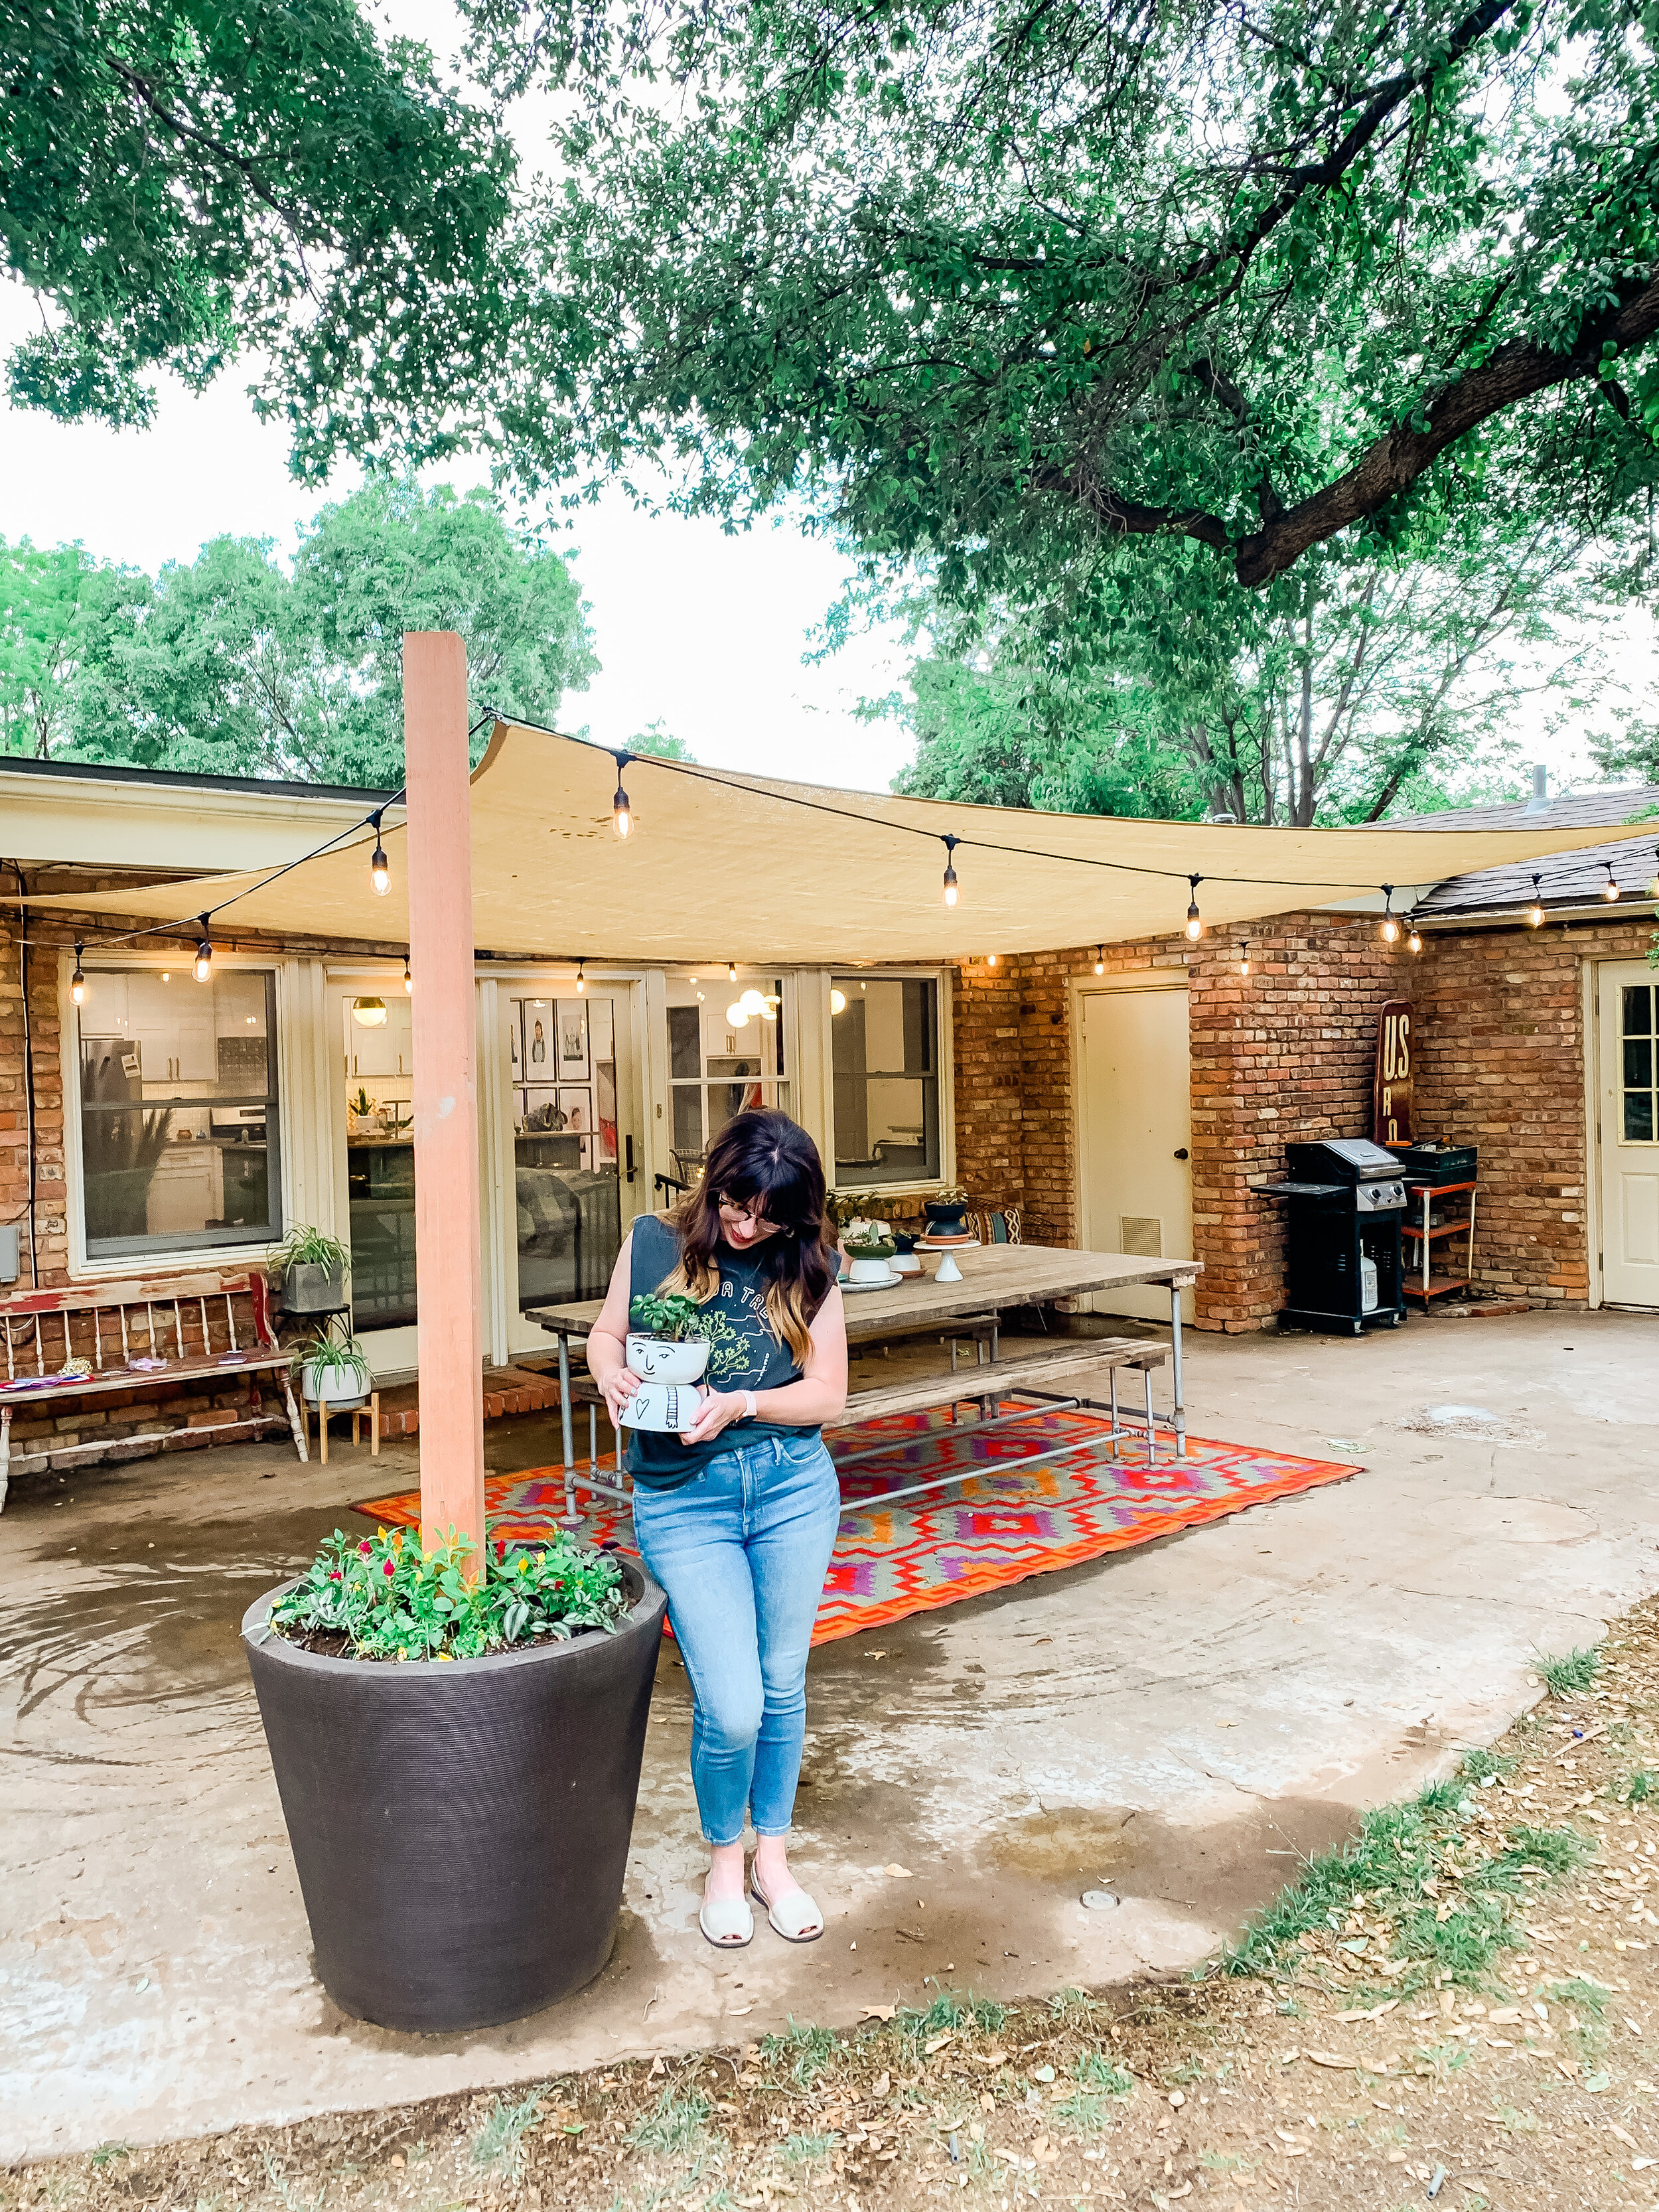
I’m excited to show you this quick and relatively inexpensive project for creating a sun shade patio area. We created our own planter post to act as an anchor point for the sail and it worked beautifully.
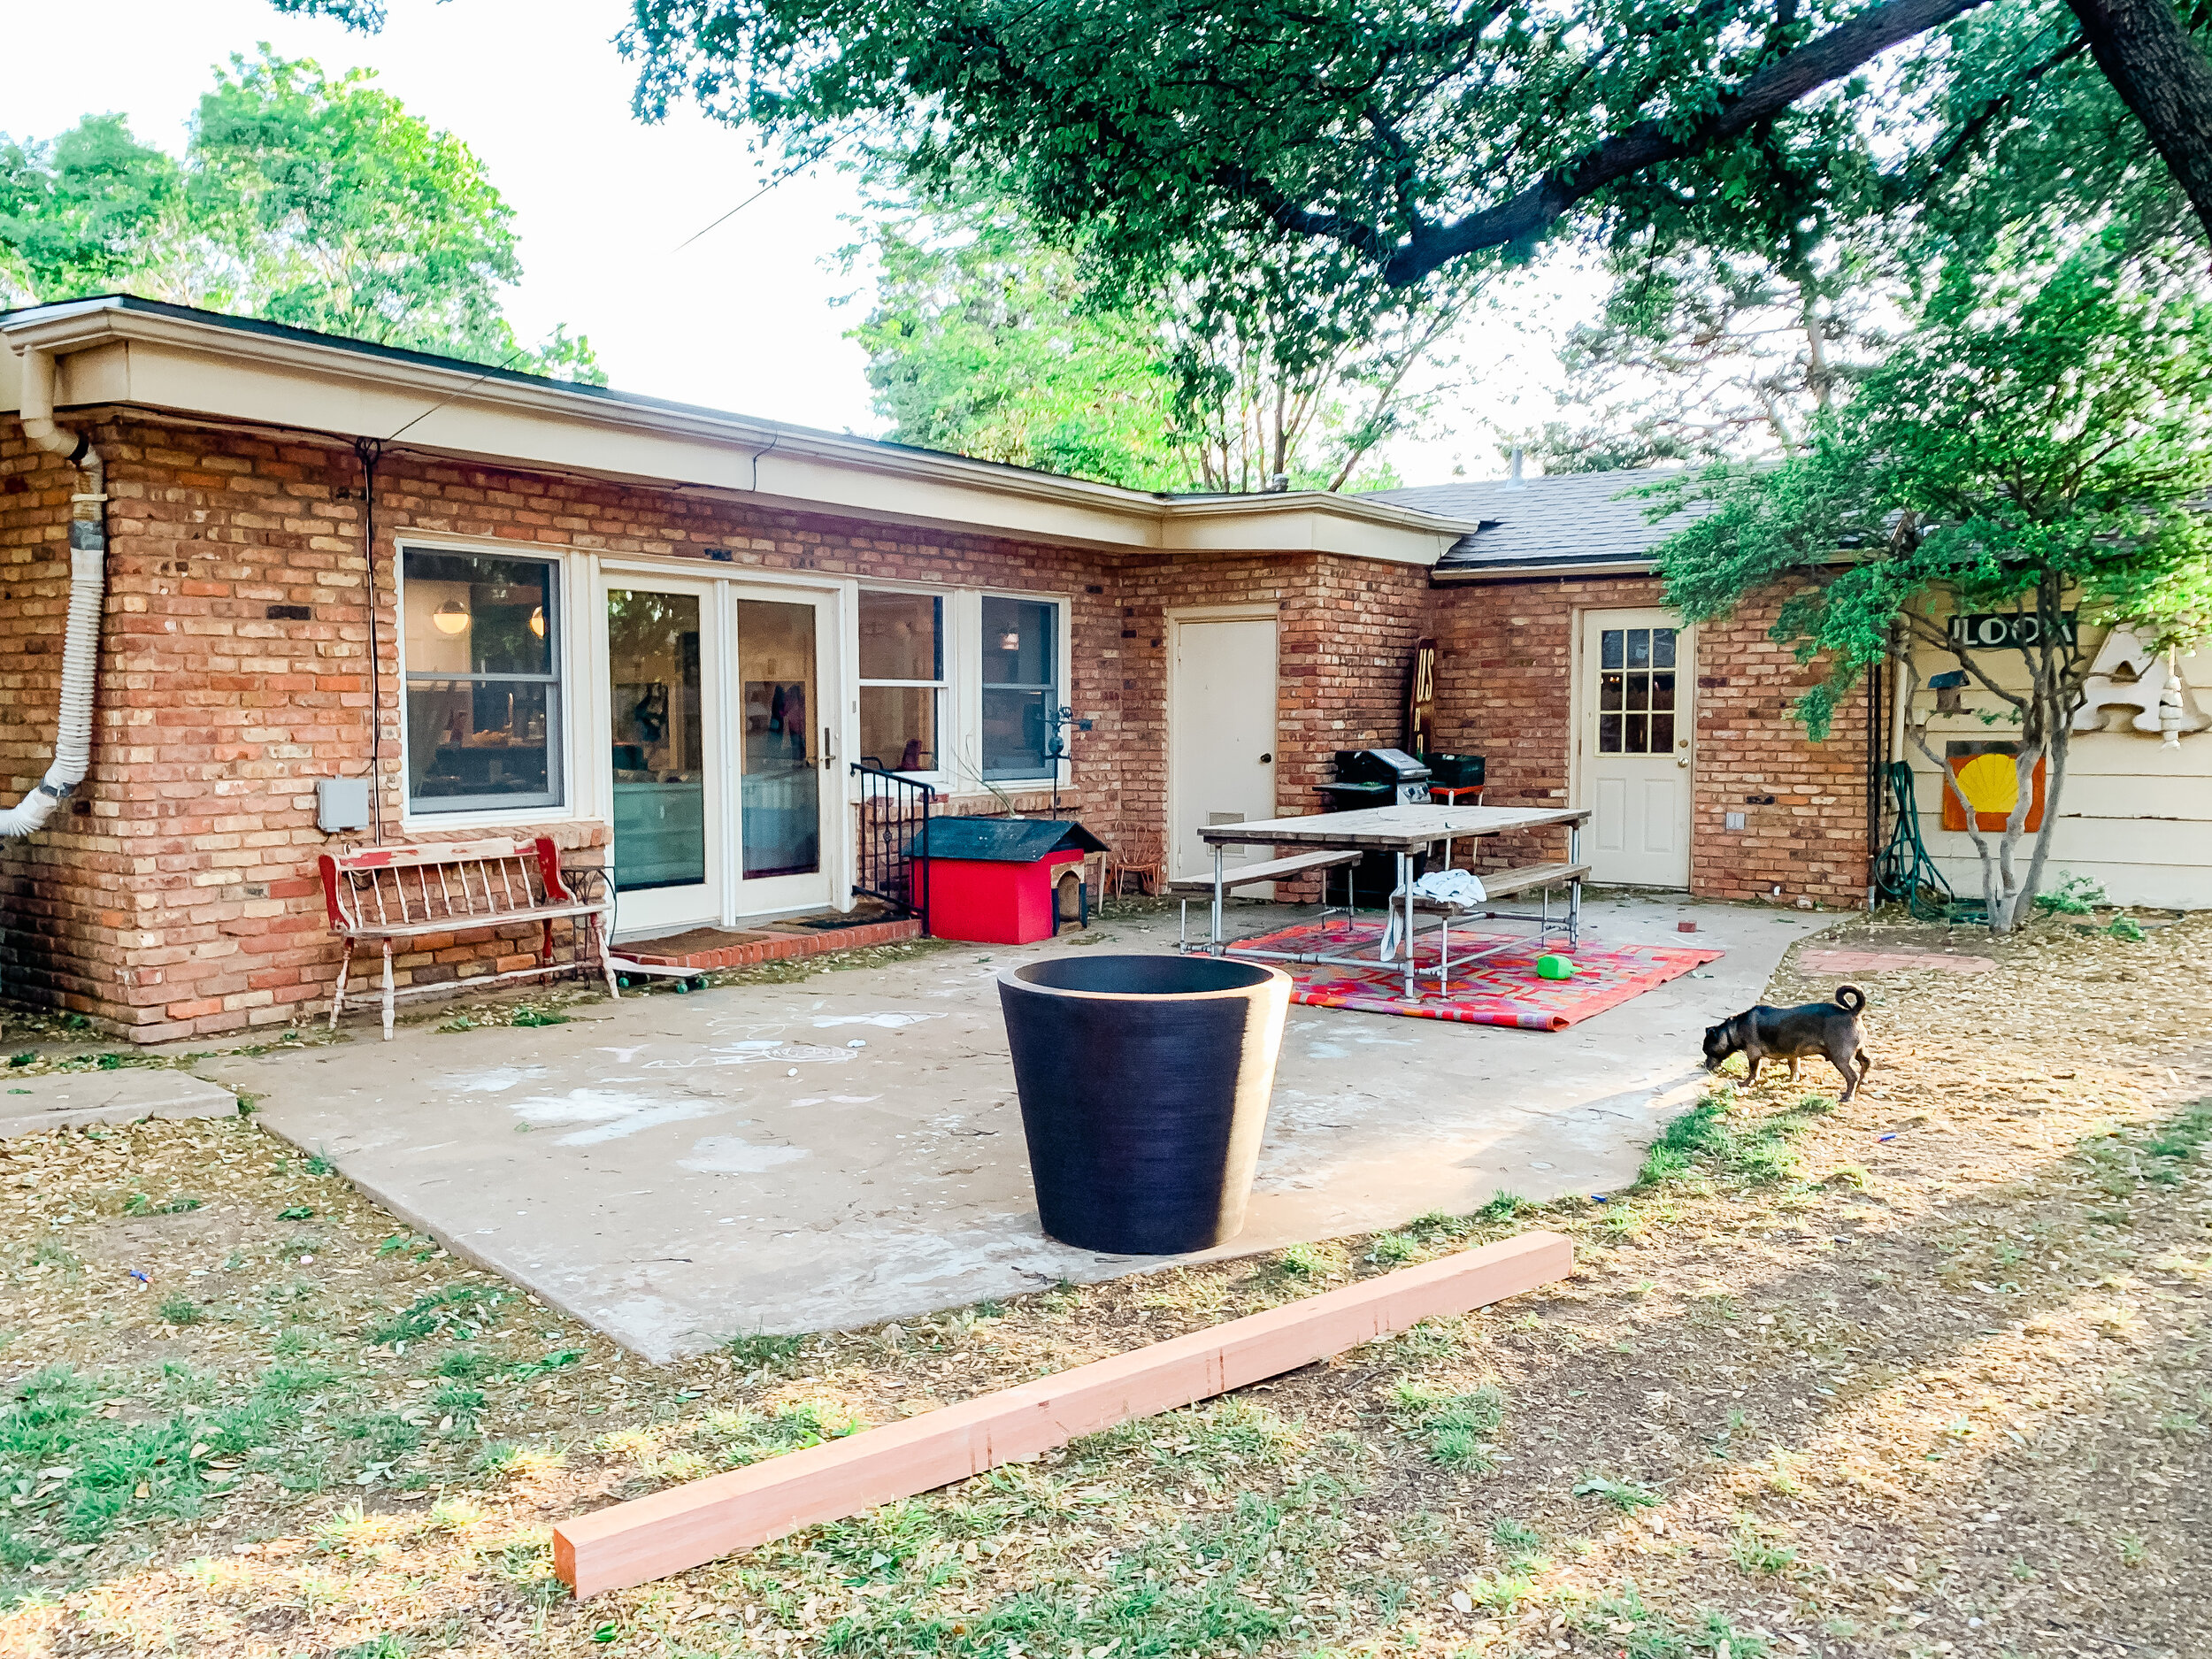
We’ve officially been in out new house for a year now and have been excited to work on some outdoor projects now that the weather is warming up. Our backyard patio area has a concrete slab, but that’s pretty much it. We’ve known we wanted to get a pergola eventually, and have even gotten a few quotes for one, but with the cost of lumber sky-high and other renovations taking priority, we opted for a much less expensive quick fix.
Materials Needed:
Shade Sail- we bought ours on Amazon and got a 14x20 size. There are a ton of sizes and colors available. Tip: be sure you remember that there will need to be some space between the shade sail and your anchor points to properly create tension and keep the shade taut. Otherwise, it will be drapey.
Outdoor String Lights- these are the ones we got and we love them! They are plastic bulbs but look like glass.
Large (and I mean LARGE) planter- we bought ours at At Home and it is probably 2’ tall and 1.5’ at the base.
Quickcrete Concrete- we bought 4 bags
4x4 8’ Cedar Post
4 1/4” Eye Hooks for anchoring the sail to the house/tree/post (hardware store)
Coated cable up to 1/8” and cable fasteners- we needed these on a couple of sides where the anchor point was farther away (hardware store)
Carabiners to easily connect/take down sail at anchor points (hardware store)
Tension hooks to adjust tension on sail- you need at least 2- these we bought on Amazon
After we gathered all our materials, we got started on the planter post. First we centered the 4x4 in the middle of the pot, and while I held it sturdy, Shawn mixed the concrete around it. It didn’t take long at all for the concrete to set. We let it dry overnight.
After the concrete was dry, we tested the post with a lot of pushing and tilting to be sure we didn’t need to add another layer of concrete. We ended up throwing in some extra bricks we had just to add some weight and drainage for the flowers I would be planting in the pot.
Then, it was time to start hanging the sun shade. This involved a lot of troubleshooting thought about where the exact anchor points needed to be. We ended up drilling 2 eye hooks into the brick of the home, one into the planter post, and one into a large tree probably 15 feet away from the patio area that was at a better angle than the original tree we’d envisioned using. Shawn set an anchor point about 15’ up in the tree so that the cable actually goes over the roof of our home and won’t interfere with anything.
We used carabiners to attach the sail so that in the case of very strong wind we could quickly take the sail down- and we plan to take it down in the winter as well.
Once everything was attached, we used the 2 tension hooks to tighten the shade.
Then, it was time to hang the lights. I’d initially thought I would put them in an x shape underneath the sail, but they hung too low for my liking, so I ended up hanging them in a box shape. Since they are made for outdoor, I wasn’t too worried about weather on them.
It was finally time to pot some plants in the planter. I drilled 6 drainage holes about 1/2 way down the pot and then filled the pot with potting soil and added plants. I am glad we added the bricks because they will soak up excess water as well, while also allowing for drainage.
And that was it! We are loving our new shade sail and I can’t wait to work on some seating/decor for the rest of the patio area!
I wish I’d done a better job taking photos of the process, but it went so quickly I forgot! Here is a semi-put-together recap of my Instagram stories about it for all you visual learners like me!
