Lissa Anglin • Part of Me Blog

Art, décor, family and photography- it's all part of me!

LIFESTYLE

a quick d.i.y. sun shade for the backyard

DIY, AnglinAbode, LIFESTYLElissa-anglin13 Comments
IMG_3308.JPG

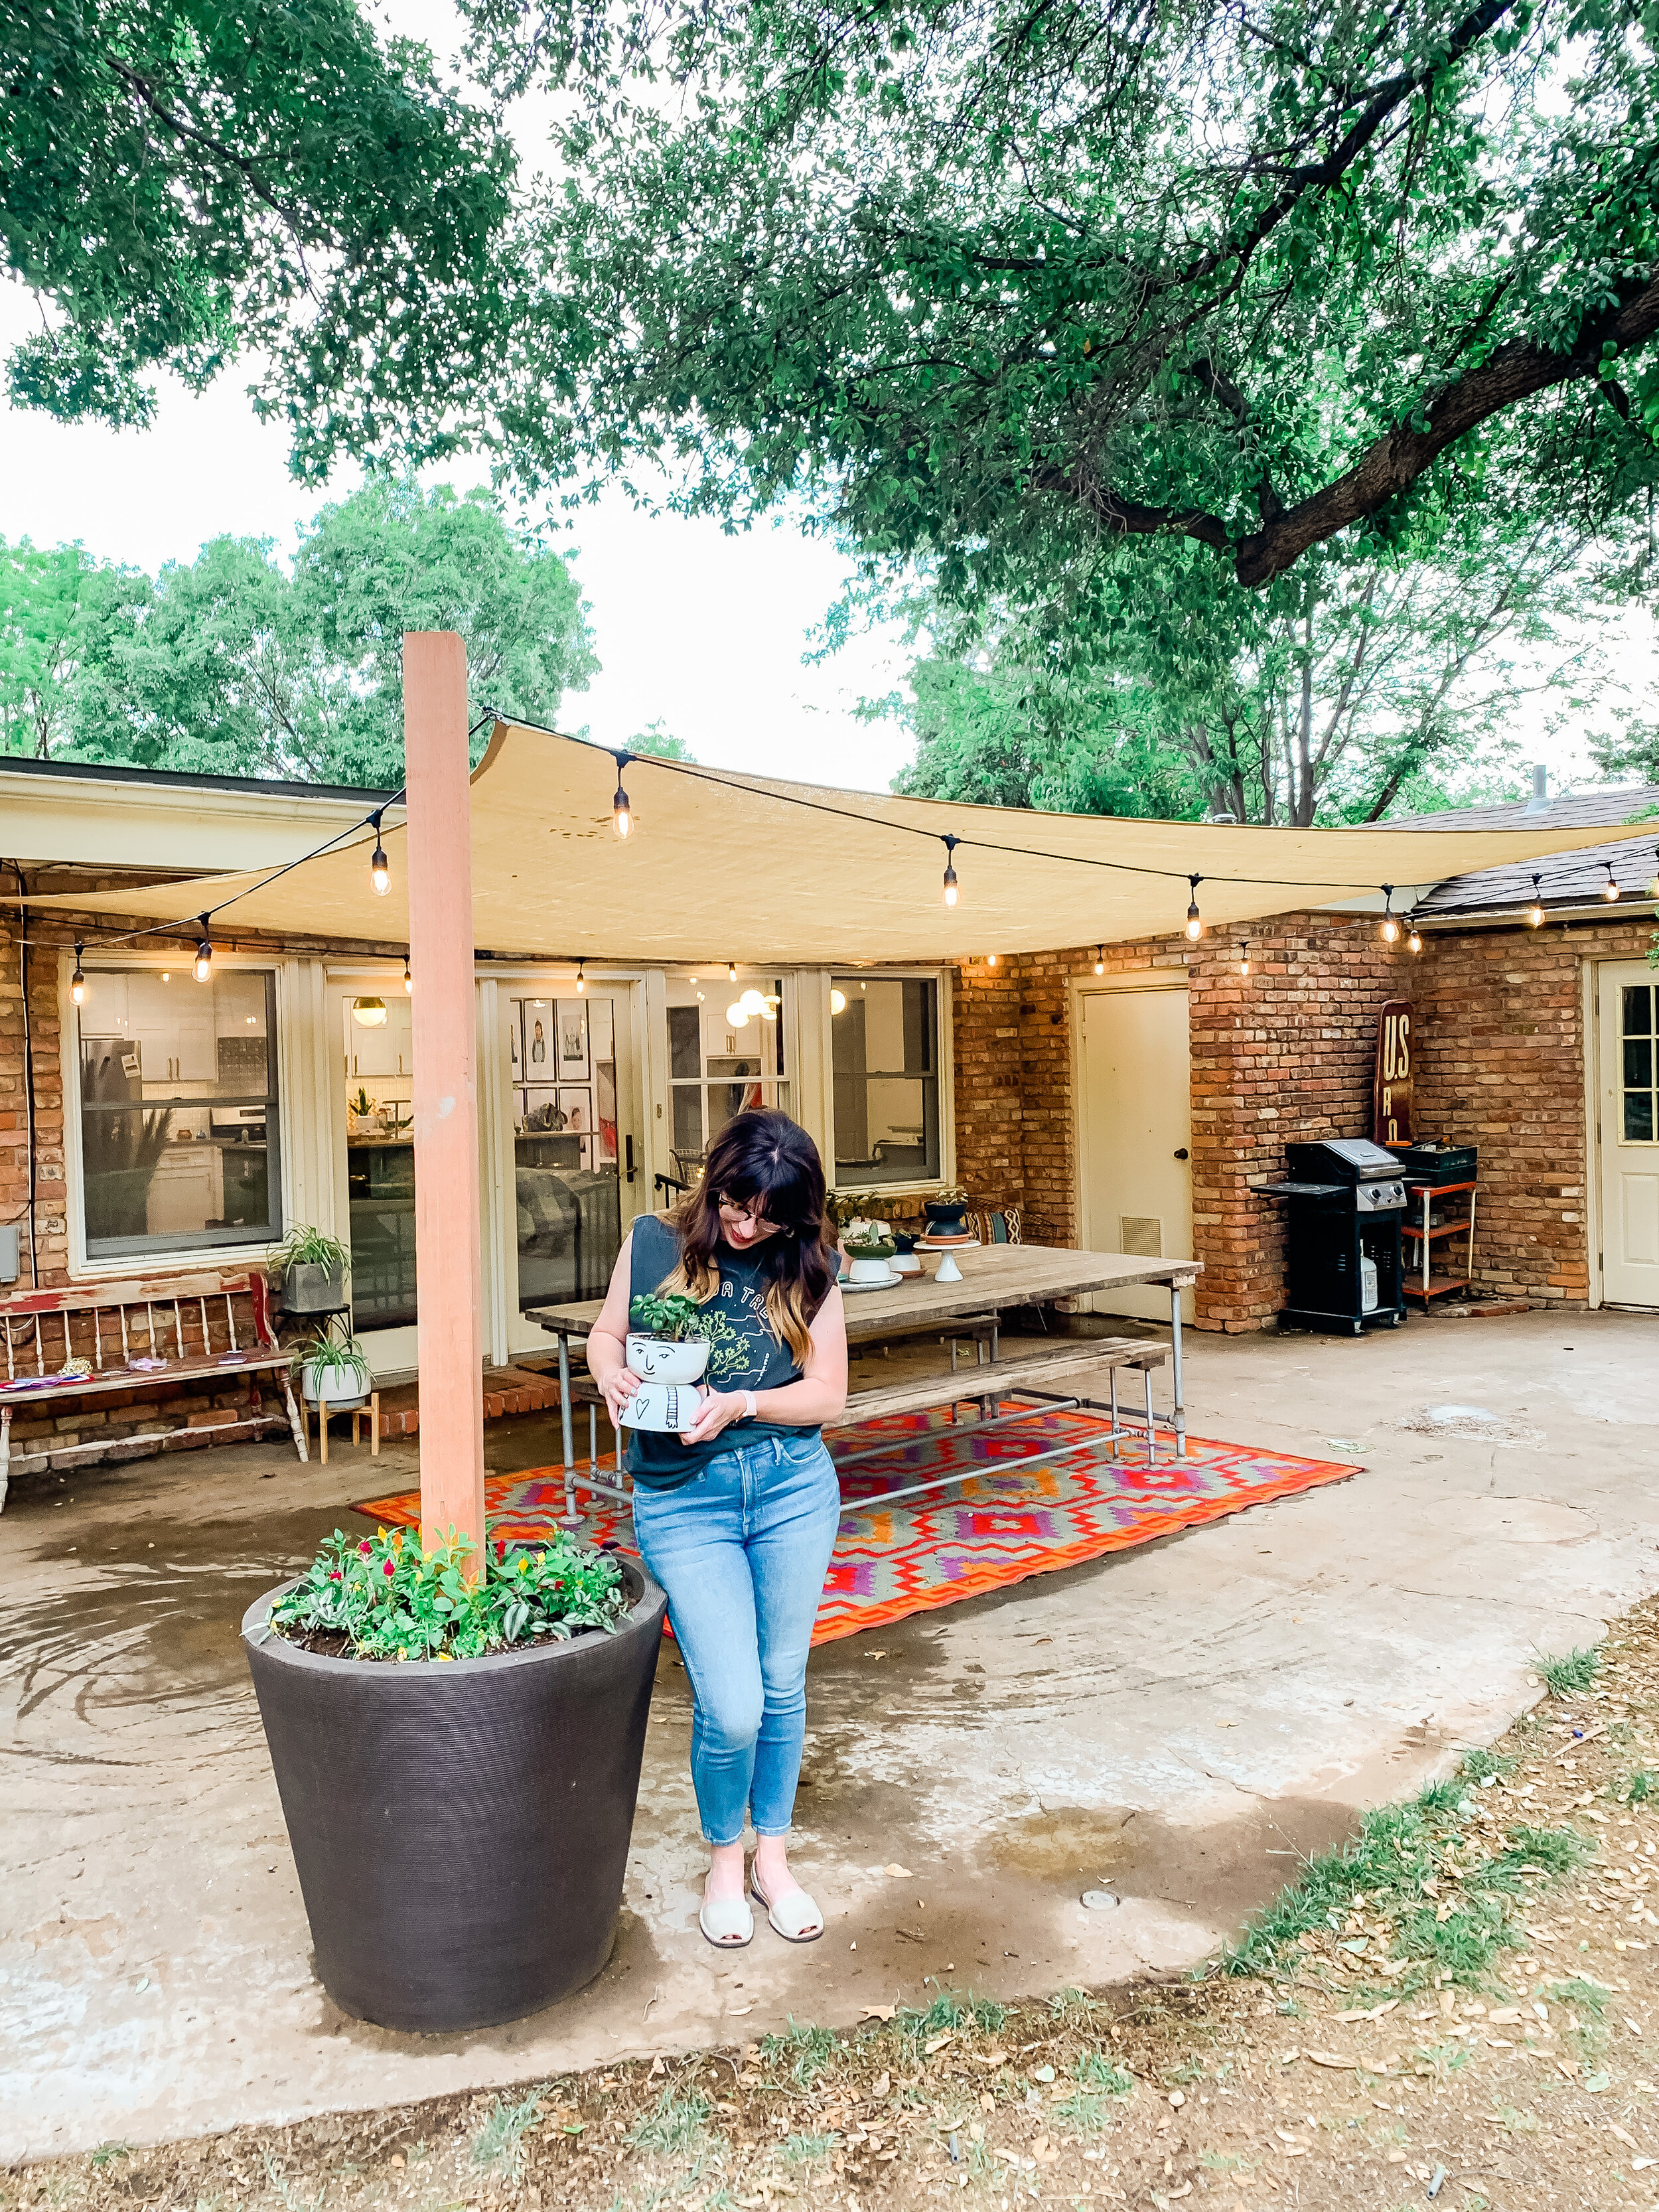
I’m excited to show you this quick and relatively inexpensive project for creating a sun shade patio area. We created our own planter post to act as an anchor point for the sail and it worked beautifully.

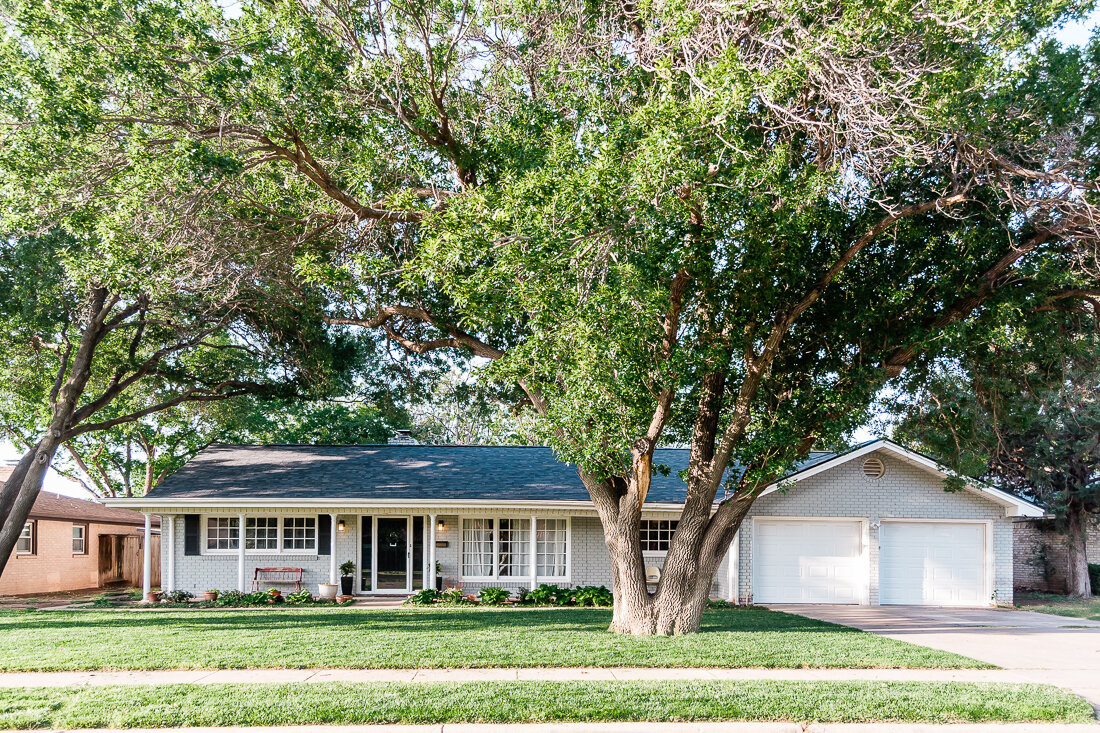
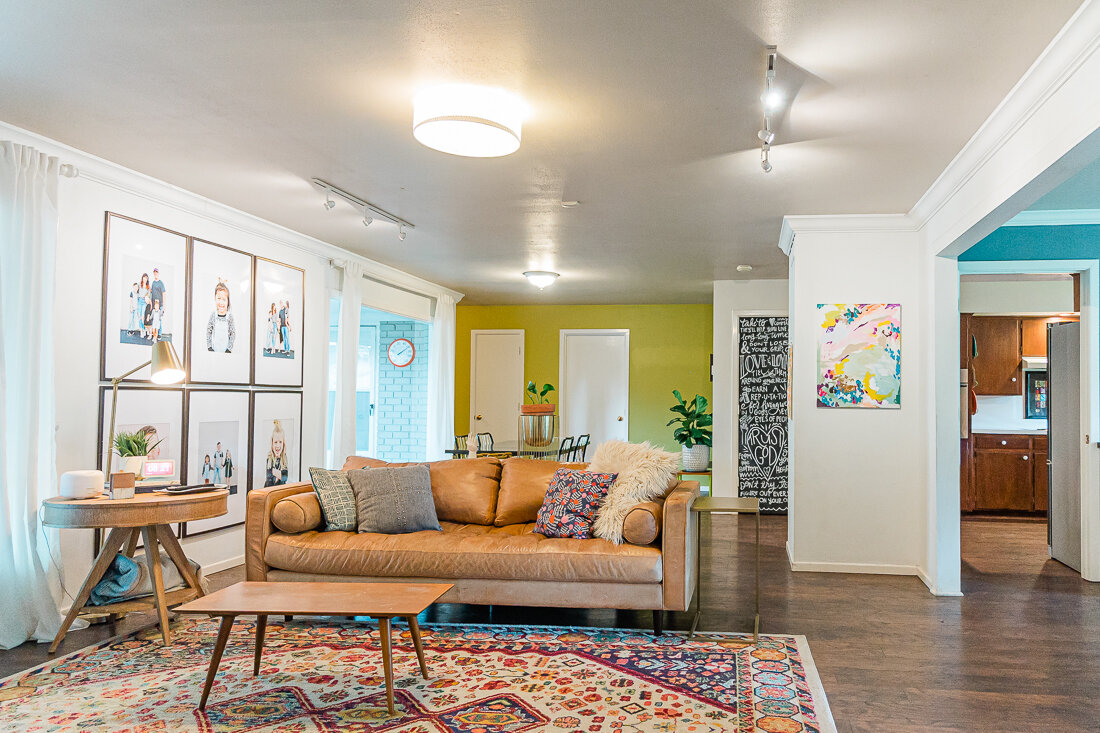
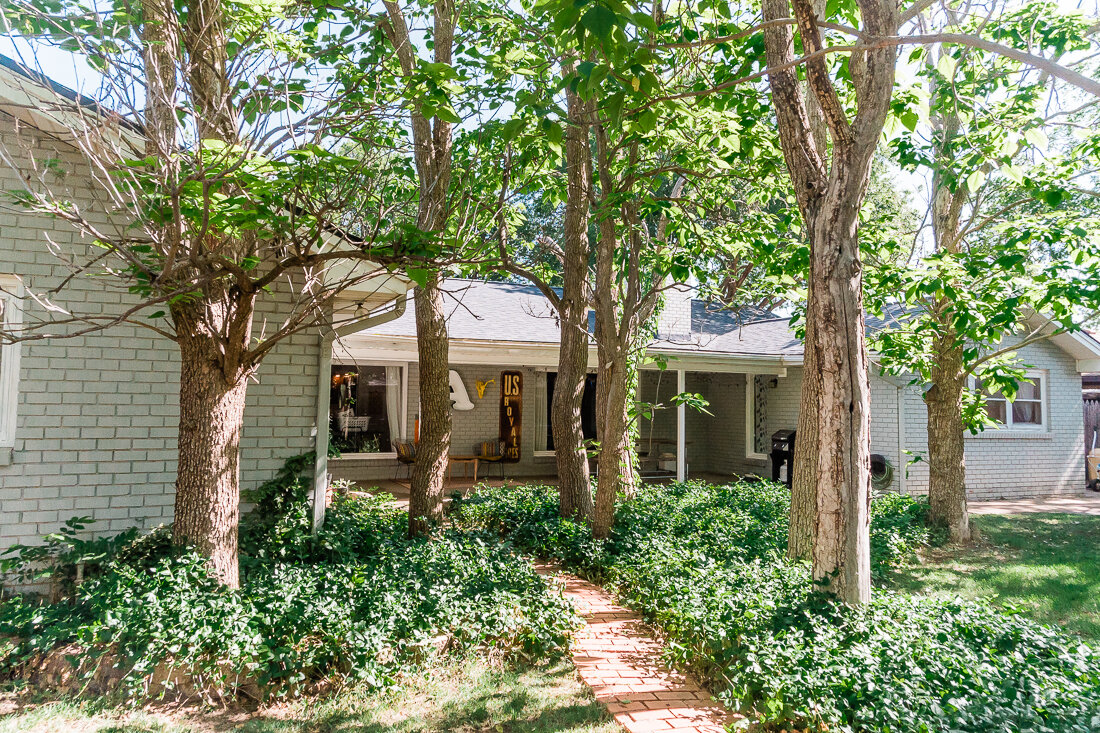
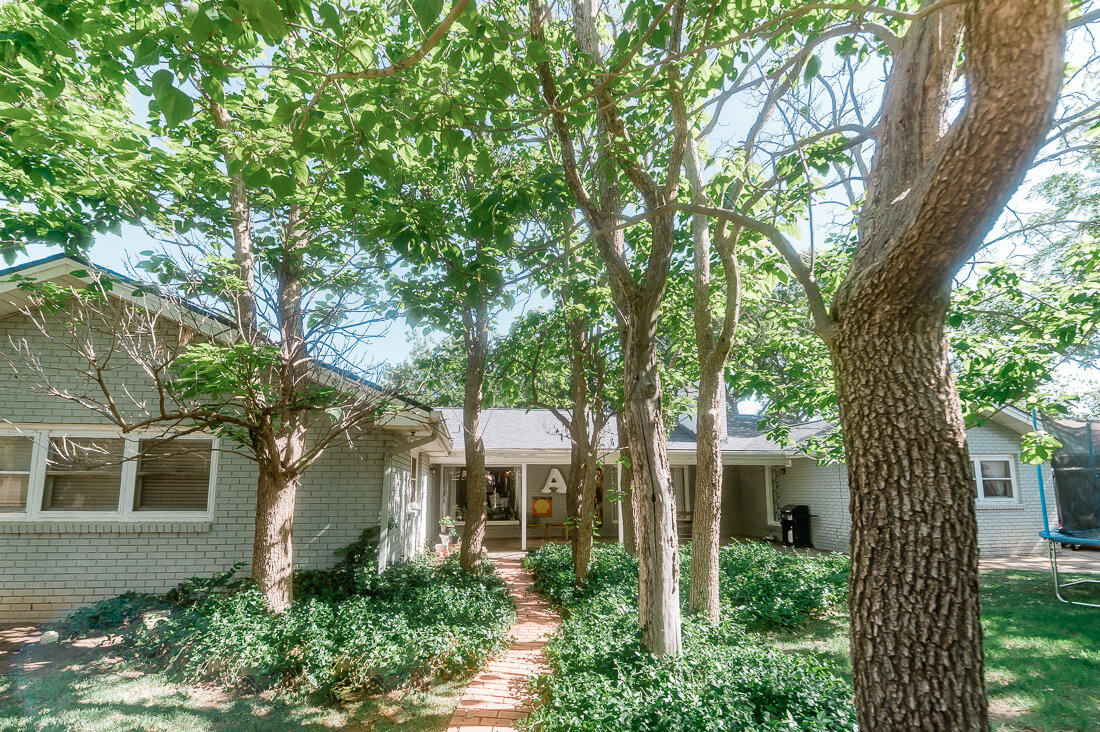
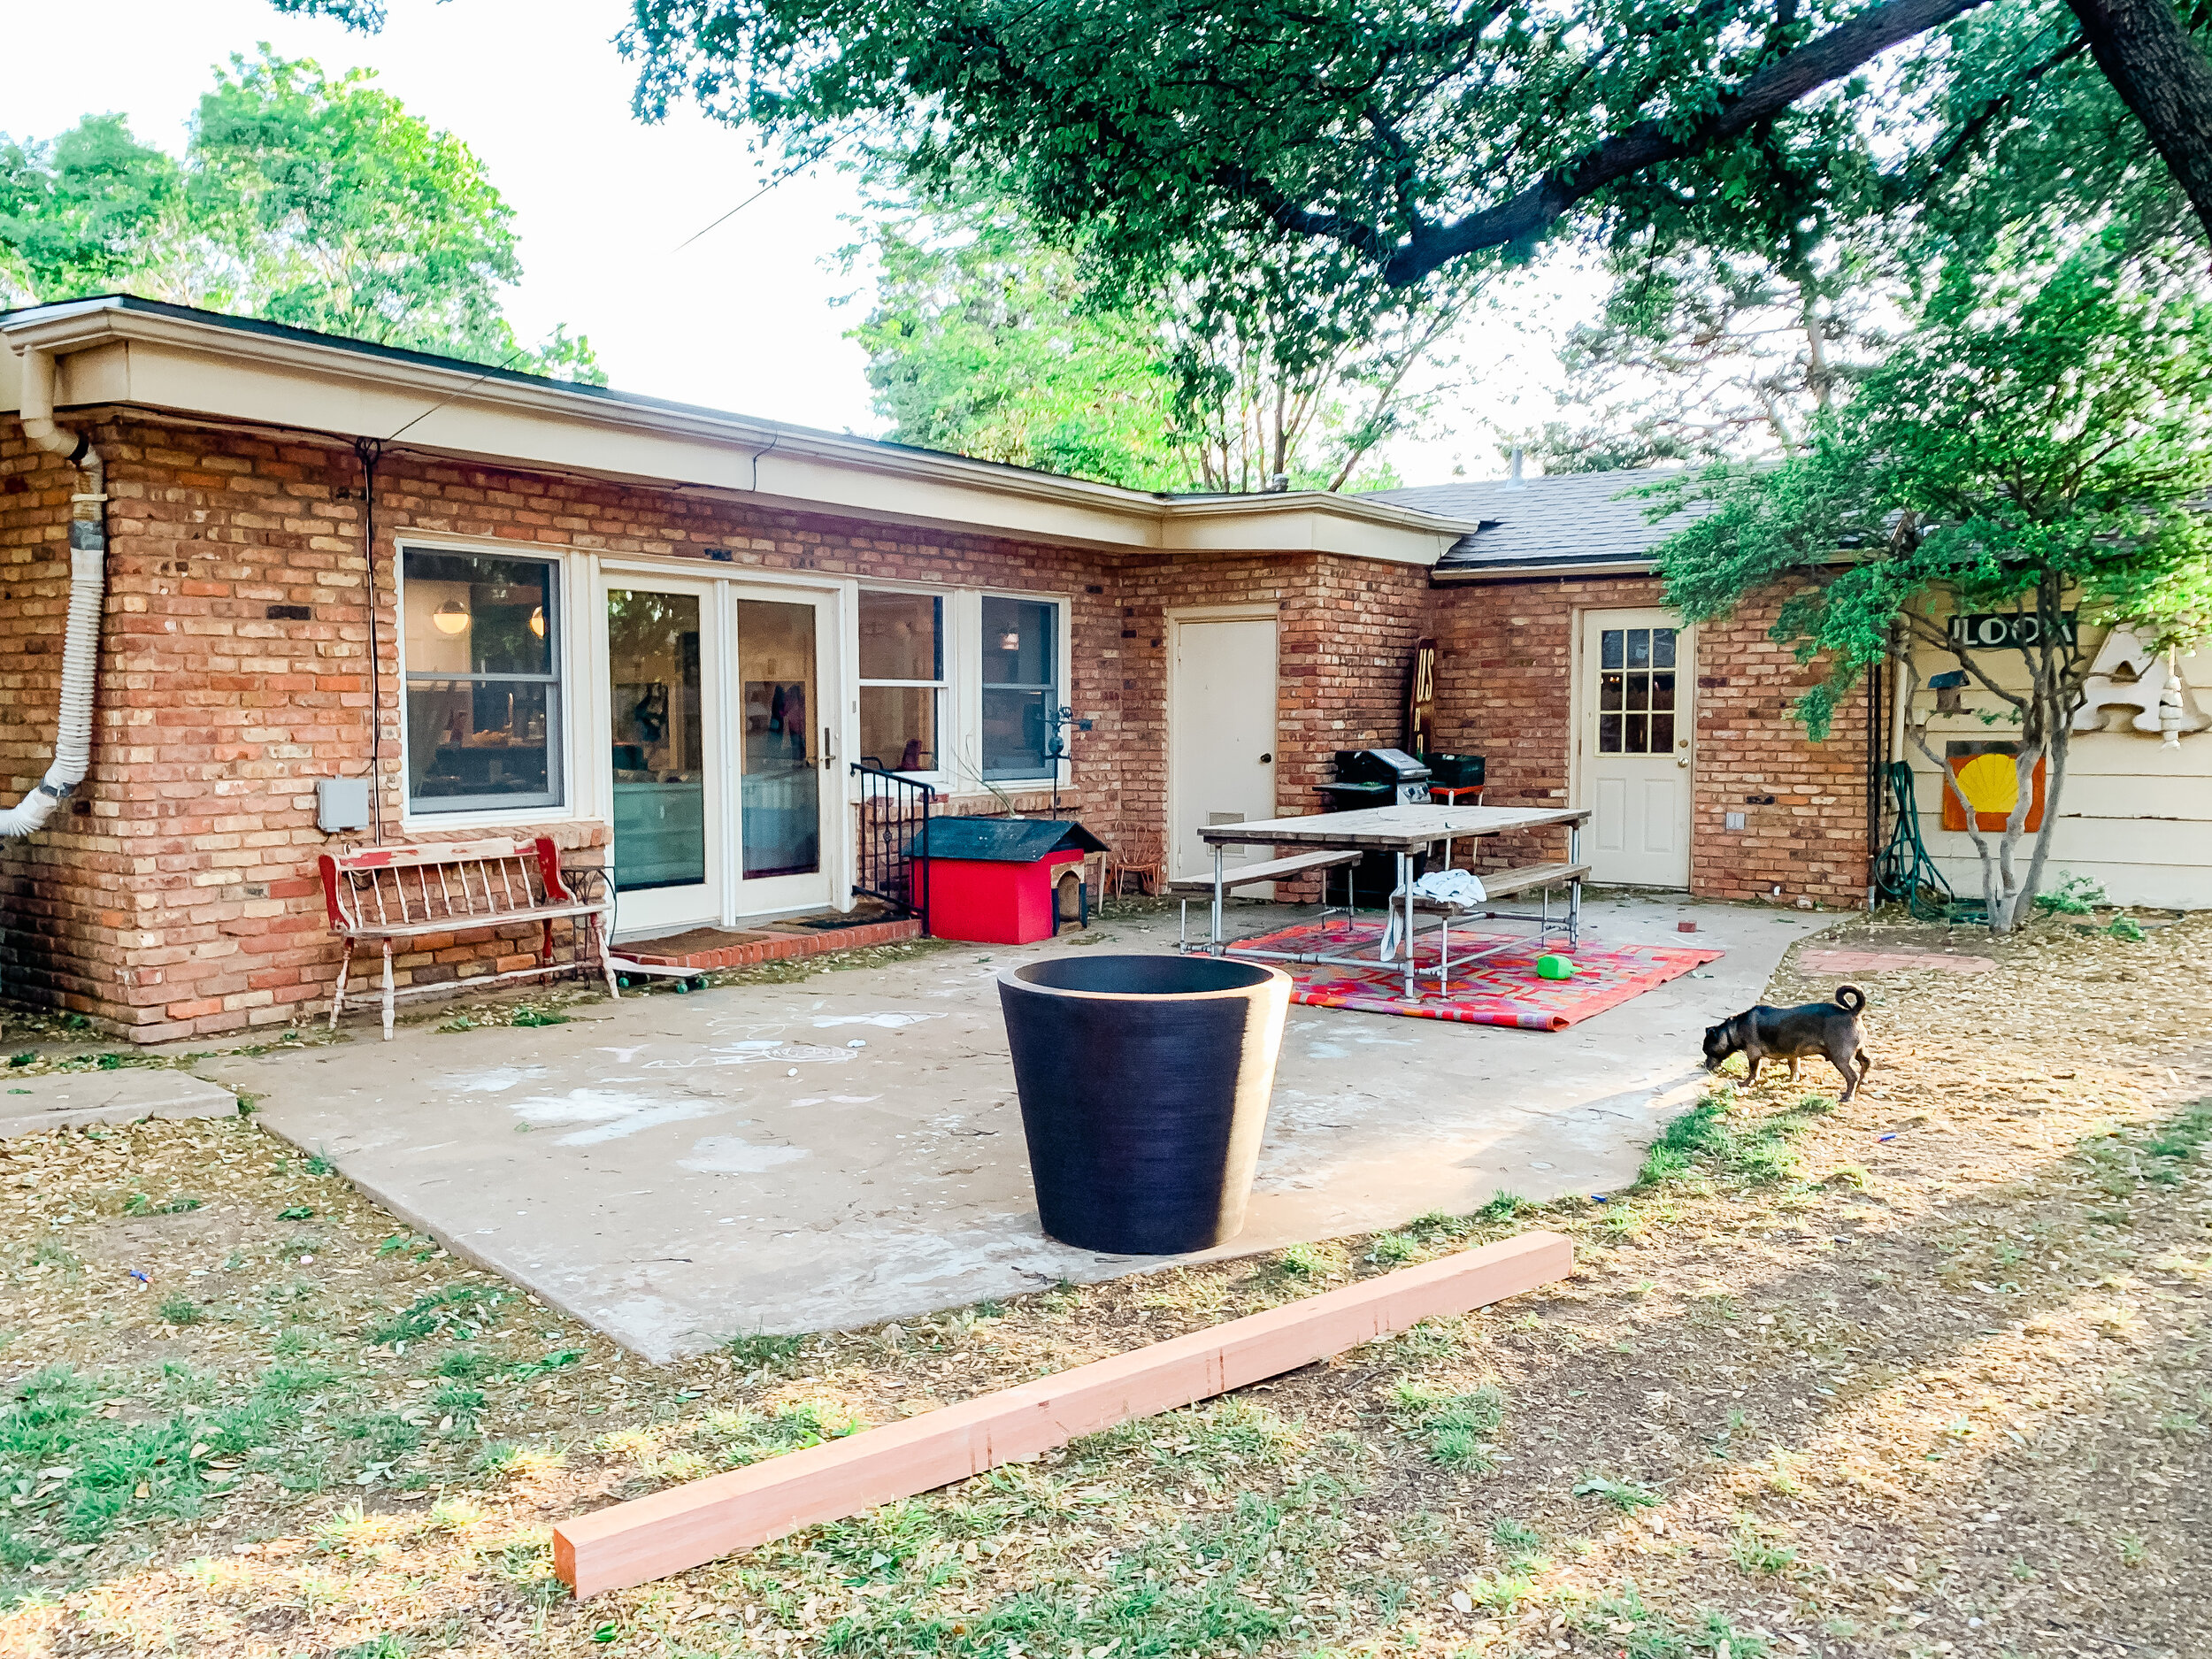
We’ve officially been in out new house for a year now and have been excited to work on some outdoor projects now that the weather is warming up. Our backyard patio area has a concrete slab, but that’s pretty much it. We’ve known we wanted to get a pergola eventually, and have even gotten a few quotes for one, but with the cost of lumber sky-high and other renovations taking priority, we opted for a much less expensive quick fix.


IMG_3052.JPG

Materials Needed:

  • Shade Sail- we bought ours on Amazon and got a 14x20 size. There are a ton of sizes and colors available. Tip: be sure you remember that there will need to be some space between the shade sail and your anchor points to properly create tension and keep the shade taut. Otherwise, it will be drapey.

  • Outdoor String Lights- these are the ones we got and we love them! They are plastic bulbs but look like glass.

  • Large (and I mean LARGE) planter- we bought ours at At Home and it is probably 2’ tall and 1.5’ at the base.

  • Quickcrete Concrete- we bought 4 bags

  • 4x4 8’ Cedar Post

  • 4 1/4” Eye Hooks for anchoring the sail to the house/tree/post (hardware store)

  • Coated cable up to 1/8” and cable fasteners- we needed these on a couple of sides where the anchor point was farther away (hardware store)

  • Carabiners to easily connect/take down sail at anchor points (hardware store)

  • Tension hooks to adjust tension on sail- you need at least 2- these we bought on Amazon

After we gathered all our materials, we got started on the planter post. First we centered the 4x4 in the middle of the pot, and while I held it sturdy, Shawn mixed the concrete around it. It didn’t take long at all for the concrete to set. We let it dry overnight.

IMG_3059.JPG

After the concrete was dry, we tested the post with a lot of pushing and tilting to be sure we didn’t need to add another layer of concrete. We ended up throwing in some extra bricks we had just to add some weight and drainage for the flowers I would be planting in the pot.

Then, it was time to start hanging the sun shade. This involved a lot of troubleshooting thought about where the exact anchor points needed to be. We ended up drilling 2 eye hooks into the brick of the home, one into the planter post, and one into a large tree probably 15 feet away from the patio area that was at a better angle than the original tree we’d envisioned using. Shawn set an anchor point about 15’ up in the tree so that the cable actually goes over the roof of our home and won’t interfere with anything.

We used carabiners to attach the sail so that in the case of very strong wind we could quickly take the sail down- and we plan to take it down in the winter as well.

partofmeblog.com.png

Once everything was attached, we used the 2 tension hooks to tighten the shade.

Then, it was time to hang the lights. I’d initially thought I would put them in an x shape underneath the sail, but they hung too low for my liking, so I ended up hanging them in a box shape. Since they are made for outdoor, I wasn’t too worried about weather on them.

It was finally time to pot some plants in the planter. I drilled 6 drainage holes about 1/2 way down the pot and then filled the pot with potting soil and added plants. I am glad we added the bricks because they will soak up excess water as well, while also allowing for drainage.

And that was it! We are loving our new shade sail and I can’t wait to work on some seating/decor for the rest of the patio area!

I wish I’d done a better job taking photos of the process, but it went so quickly I forgot! Here is a semi-put-together recap of my Instagram stories about it for all you visual learners like me!

It's a Family Day in the LBK!

LIFESTYLE, TRAVELlissa-anglinComment

This blog post is sponsored by Visit Lubbock, an organization I was honored and excited to work with because of all the great things they do for our community. They work hard to be at the forefront of all things new and exciting in Lubbock and are my first go-to for news and events!

You know we love a good adventure- even if we don’t have to go far to find it! And thankfully- we don’t! When Visit Lubbock contacted me about doing a Family Day in Lubbock for National Travel and Tourism Week, I couldn’t say “yes!” fast enough.

Shawn and I grew up in a small West Texas town about 3 hours from Lubbock, and truly never expected to stay after moving here just after we were married. But, we have! And I believe we’ve stayed for many reasons:

IMG_2505.jpg
  1. The People. Truly, Lubbock is one of the friendliest places on earth. We have found wonderful friends and a church community here like none other, and we are so thankful for them.

  2. The Culture. We love living in a city that has a large university (fun sports games to go to and other events, beautiful campus to walk through, camps and programs for the kids), and a thriving arts community. Being an artist myself, the arts scene here constantly inspires me.

  3. The Food. We have a LOT of GREAT places to eat- driving through town, it doesn’t take long to see that! There is always something new to try and discover, plus tried-and-true faves.

  4. The Size. Lubbock isn’t the biggest city in Texas, and we like it that way. “Across town” is a 20 minute drive. It’s not too big, and not too small. Coming from a smaller town, I thought I’d really made it big when I moved to a city with a Starbucks!

So, last Saturday we set off on a Family Fun Day in Lubbock- and it was so much fun, we are definitely going to be doing it again soon!

VisitLubbock-3566.jpg

1st Stop: J&B Coffee

We are a little partial to this coffee shop because it is the one housed comfortably in our neighborhood- but if we ever were to move, we’d sure miss it! It’s a cozy study spot for many TTU students, but there are also a lot of regulars here.

Things you must try if you’ve never been:

  • Red Raider Royale (so rich and delicious!)

  • Lavender Cold Brew (seasonal)

  • Vietnamese Iced Coffee

  • Any of their locally-roasted coffees- our personal faves are Costa Rica La Minita and Governor’s Cup

IMG_2479.jpg

Other great local coffee shops:

Sugar Brown’s

Pearl Tea

Monomyth Coffee

Yellow House Coffee

Tova Coffeehouse

Tumbleweed and Sage

He-Brews

IMG_2521.jpg

2nd Stop: Texas Tech University’s Public Art Collection

Texas Tech has a beautiful campus sprinkled with amazing art and sculpture- and this is no accident. Through the Public Art Program, public artworks are funded using one percent of the estimated total cost of each new major capital project. I love this program and what it has done for campus and for art lovers like us!

The program has put together several free walking tracks where you can view the amazing sculptures and other art- many of which are interactive. Our kids LOVED this “scavenger hunt” and it was the perfect way to expel some extra energy they had due to the hot chocolates at J&B.

We had never done a walking track before and we are excited to invite friends to do it again- there is so much to see and did I mention it is completely free?

IMG_2530.jpg
VisitLubbock-3602.jpg
IMG_2546.jpg

Other cool things to check out:

American Wind Power Center

Silent Wings Museum

Buddy Holly Statue and West Texas Walk of Fame

Buddy Holly Museum

IMG_2559.jpg

Next Stop: Lunch @ Tom and Bingo’s

Tom and Bingo’s is a local favorite and exactly what you want in a BBQ joint. It’s got limited seating, delicious brisket, and a line out the door. We were lucky to get there while there were seats available and they hadn’t run out of food! (Yes, they run out everyday- it’s that good!)

My parent's joined us for lunch and despite our large group the employees at Tom and Bingo’s were so kind and helpful. We love their brisket sandwiches and Bingo burgers. Worth a stop and worth the wait if there is a line.

VisitLubbock-3613.jpg
IMG_2575.jpg

Other local lunch faves:

Dirk’s

Caprock Cafe

The Crafthouse Gastropub

Capital Pizza

Choochai

Burklee Hill Vineyards

Blue Sky

Next Stop: The National Ranching Heritage Center

If you’ve never been to the NRHC, they have something for everyone- and the perfect time to go is a beautiful West Texas day like we had! Here, there is a ton of history and they’ve gathered ranch buildings, old homes and artifacts of life on the Plains and displayed them in a city-like configuration where you can walk through them and see just how they were used.

Our kids loved looking for Jackrabbit Joe throughout the property and finally found him at the train depot. The NRHC hosts a variety of events throughout the year- like the Candlelight at the Ranch during the holidays- and it is a truly magical experience.

IMG_2624.jpg
IMG_2592.jpg
IMG_2583.jpg

Other fun activities for kids in Lubbock:

Play Street Museum

YWCA Sun ‘N Fun

Prairie Dog Town

Joyland

Altitude Trampoline Park

Science Spectrum Museum

Lubbock Lake Landmark

Stars & Stripes Drive In Movie Theater

4ore Golf

Miss Megan’s Make Room

Texas Tech Sporting Events (check out their kids club!)

Frisbee Golf at Mae Simmons Park

Buffalo Springs Lake

South Plains Fair

Caprock Canyons State Park

IMG_5259.jpg


Next Stop: The LHUCA and CASP Studios

The arts district in Lubbock is special to us and there are so many cool things to do and see there! It is full of fun, colorful murals and sculpture- worth a visit if even to just walk around. At the LHUCA, we were able to see some amazing artwork and then had the opportunity to make clay pinch pots at the clay studio! Instructor Mica was so kind and great with the kids- we had a blast!

The LHUCA hosts the First Friday Art Trail every month and is one of our favorite things to do in the “Hub City”. They also have many art classes - for kids and adults! They’re hosting youth summer camps, too- check it out here.

IMG_2641.jpg

Other cool downtown spots to check out:

Two Docs Brewery

LBK Brewery

Buddy Holly Hall

CASP

Jux Ta Posh

The Garden


Last Stop: Dinner at Triple J Chophouse

Always a fave with us- Triple J! This restaurant has been a staple in our Lubbock life- locally brewed beer, live music, and delicious eats with a fun atmosphere. We love pretty much the entire menu, but have a few things we always order:

Raider Red Ale (brewed by Triple J)

Chilton (the local cocktail created first in Lubbock)

House salad with house dressing (lemon vinaigrette- SO good!)

Wedge salad (equally delicious!)

Any of their steaks- we love the Miss Kitty Kat and Sir Nick

Pizzas (kids always get this)

Chicken “Potted” Pie

And of course their house-made rolls and butter- you WILL leave full, I promise!

IMG_5273.jpg

Other great dinner spots with kids:

The Plaza

Cook’s Garage

Teddy Jack’s

Picosos

And because mom and dad need a date night every now and then:

La Diosa

Stellas & Manhattan 9

Italian Garden

The West Table

Table 82

Cook’s Garage

La Diosa

The Funky Door

Burklee Hill Vineyards

The Nicolette

IMG_2542.jpg

Lastly, I wanted to include some of our local favorites in other categories:

Snacks and Treats:

The Pie Bar

Holly Hop Ice Cream Shop

The Soda Shack

Kurbside

Shopping:

Jux Ta Posh

Odds and Ends

Barque

The Heritage Press

J Hoffman

Vibeage

Wineries:

English Newsom

McPherson Cellars

Burklee Hill

Llano Estacado Winery

Pheasant Ridge

Bolen Vineyards

Thank you to Visit Lubbock for giving us the gift of family memory making in our city! I hope this blog post has been helpful and will try to update my lists as I think of new places or places I have missed. AND- if you’d like to add to my lists, feel free to comment your local faves!

Our Trip To Monahans Sandhills State Park

TRAVEL, MOMLIFE, LIFESTYLElissa-anglin1 Comment
Monahans-0093.jpg

Mid-December of this year, I began anticipating the stir-crazy that inevitably happens in our household when our kids are out of school for more than a week. I don’t like it, they don’t like it, and I’ve learned that if I don’t have any options, the ship can sink rather quickly.

So I started searching for some easy (and COVID/social distancing friendly) day-trip options for our city- Lubbock, TX- and friends, let me tell you- there weren’t a lot of options that we hadn’t already done- save one.

We’d never visited the sandhills outside of Monahans.

So I ordered some sleds and put it on the calendar. It’s about a 3 hour road trip for us which isn’t great, but Shawn and I did enjoy a quiet ride home while the kids were asleep after a long day.

Monahans-0103.jpg

Visiting Monahans Sandhills State Park 

For those of you who’ve never heard of this truly unique place, it is a state park located between Monahans and Odessa, Texas, which is almost the middle of nowhere. The park almost seems to pop up out of the earth with an ethereal almost moon-like feel- just huge expanses of sand dunes all around. It is beautiful and unusual- and the perfect place to take some sleds and do some Texas-style sledding!

The sand is deceptive- see those people on the hill? They were at least a half mile away!

The sand is deceptive- see those people on the hill? They were at least a half mile away!

It was early January when we visited and the weather stayed at a warm-ish 50 degrees. The wind did pick up in late afternoon- which was very unpleasant- especially if you’re facing the wrong way with your mouth open...ask me how I know, haha. I am glad, though, we visited in winter as I would suspect that summertime is brutal in the heat. 

We had a great time and it was a day trip we will likely repeat. Here are my tips if you’re planning a trip:

Monahans-0077.jpg
  • There is an entrance fee to the park, but at the time we went the office was closed and there was a link to pay online listed at the entrance. The fee is $4 per person, and the park is open until 10 pm. 

  • You can camp at the park if that’s your thing- I’d love to be there for sunrise/sunset to photograph the area- I am sure it is beautiful. More info on camping here.

  • There were restrooms, but at the time we visited, they were locked. If you have littles, I would definitely bring a port a potty in the car- here is the one we have had for years and has saved us many times!

  • Go in the fall, winter, or early spring- otherwise you will seriously risk getting sunburned and dehydrated. It’s a literal desert, y’all.

  • There are many parking spaces and picnic tables with grills in easy walking distance to the dunes. There was even a volleyball net set up ready for play. 


Overall, we found it easy to get around. We found many great hills to sled down and you don’t actually go super fast unless you go down a man-made path. It’s very comparable to sledding in the snow. 

Even our 4 year old was going down the steepest hill and the sand is so soft it really cushions the fall if you do take a tumble.

Monahans-0109.jpg

That being said, it can be tough to climb back up a hill and would not be a great excursion for anyone who has difficulty walking or climbing. It’s very much like walking in powdery snow.


What to bring:

  1. Sunscreen (yes, even in the winter the reflection of the sun on the sand is BRIGHT- our fave here)

  2. Cooler with water and snacks (we left this in our car and just hiked back for a snack time)

  3. Sunglasses

  4. Case or zipper pocket for phones/cameras (the sand will easily get into these items, and you’ll want to make sure they stay protected)

  5. Shoes: depending on what time of year you go, you may not even need them. The sand is very soft but there are weeds/rocks (they’re easy to avoid). Most of our crew wore tennis shoes which will need to be washed, and Shawn chose boots which were heavier and harder to walk in but more sand-proof. So shoes are really personal preference. 

  6. Beach bag (with waterproof lining so you can spray sand off later)

  7. Change of clothes- I brought a change of clothes for all the kids and we put all the sandy clothing in a beach bag so that my car wasn’t filled with sand. This worked really well- there are restrooms you could change in, but we just did it in the car 

  8. Sleds- I didn’t see anywhere you could rent these, so we brought our own. Here are the ones we have and they worked well!

Optional:

  1. Folding lawn chairs- we saw a few families using these near the picnic tables and thought it was super smart.

  2. Sand toys- our girls love playing in the sand when we go to the beach and probably would have enjoyed playing with some sand toys there, too- however, none of the sand is wet so it wouldn’t stick together, but hey- worth a shot if it means a few more minutes of entertainment for the kiddos!

  3. Volleyball- like I said, they had a volleyball court set up, which is fun!

  4. Frisbee

  5. Backup battery Phone charger- service for us wasn’t great, and our phone batteries dies quickly that day. I wish I had brought my backup charger.

  6. Lightweight backpack or Camelbak- this would be especially helpful if you are going during the warmer months. Mine is much older than this one, but I have had it since college and my Camelbak Cloudwalker is frequently used by both Shawn and me (camping, hiking, Disney, soccer/baseball games), and it’s held up so well. Definitely worth the investment!

I hope this has been helpful! In a year where travel was limited, I was thankful to find some neat places not too far away to create memories with our kids. They have talked about this day trip a lot since and keep wanting to go back to sled in the sand!

Monahans-0074.jpg

holistic health with covenant children's

LIFESTYLElissa-anglinComment
IMG_6816.JPG

When I was in high school, I wanted to be an art therapist. Ever heard of that? It’s basically a clinician that uses visual art and art practices to promote healing and healthy mental and emotional expression for patients undergoing care at a hospital. Pretty cool, right?

I also have a few friends that are Child Life Specialists- and let me tell you- they are special people who do a very important job. Child life specialists are trained professionals who help children cope with the stress and uncertainty of illness, injury, disability, and hospitalization. These Specialists enter the hospital room with the knowledge and understanding that people need more than physical help to heal- and they also provide the resources patients need to take care of their mental, emotional and spiritual needs.

Did you know Covenant Children’s employs Child Life Specialists specifically there to help with these things?

  • Preparation for medical procedures, tests or surgeries

  • Developmentally appropriate education about diagnosis, treatments and medical environment

  • Assistance with developing coping strategies, distraction and/or support during stressful events

  • Opportunities to explore real medical equipment through medical play

  • Developmentally appropriate activities and toys for patients

  • Support and education geared toward siblings of hospitalized patients

  • End-of-life support to patient and family as well as bereavement support for family members

  • Celebrations of birthdays, medical milestones, and holidays

You can check out more about Covenant’s Child Life Specialists here.

I think that is pretty cool! I want to teach my children to recognize their need for health not only in their physical bodies, but in their thoughts and emotions as well. I believe it’s going to be very important for my children’s generation to understand how to manage their minds in a world that is constantly overwhelming them with information.

I also want them to take charge of their own health- and I believe that a holistic approach to health is so important. I have seen how my own stress and anxiety has affected my physical and mental/emotional health, and so it’s a top priority to help my children process their own feelings and thoughts. I want them to have the skills they need to cope with the hard things in life, but also be able to celebrate the good!

I love knowing that when we visit Covenant Children’s, the people caring for my kids have the same philosophy- and that they’re not simply looking for a physical healing, but want to encourage mental, spiritual, and emotional health as well. They’ve incorporated Integrative Care, which provides “developmental, educational, and expressive opportunities through play and the creative arts to help our children and families better cope with illness, hospitalization, and recovery.” More info on their Integrative Care here.

We’re so thankful that a specialized hospital like this is just a mile away from home- and that they’re providing top-level care to the region. It brings me a huge sense of security to know where we’ll go and that we’ll be receiving excellent care when we have a need.

How do you teach your children to care for their mental and emotional health? I’d love to hear!

IMG_6814.JPG


my best staging tips when selling your home

HOME, LIFESTYLElissa-anglin1 Comment
DSC_1104.jpg

If you’ve been following along on Instagram, you know we are moving houses! We have loved our current home for 6 years, and a lot has changed since we moved in- like adding 2 more people to our family and somehow accumulating a LOT more stuff.

We aren’t leaving Lubbock, just moving neighborhoods. Many weeks ago, our Realtor and friend, Jim Archer (who we highly recommend!) knew our desire to find an older home to fix up, and called us about a home he’d found in one of our favorite Lubbock neighborhoods. So, we went to see it, and hated it. But then- plot twist- we ended up buying it! I can’t wait to share more about that, but this post is dedicated to STAGING.

Once we knew we were buying the new house for sure, the scramble to stage our current home began.

Here’s what we did to prep our home to be put on the market:

We ended up taking down the map and frames here so that the brick was the focus of our entryway.

We ended up taking down the map and frames here so that the brick was the focus of our entryway.

1. We MAJORLY de-cluttered. I went through every junk drawer, closet, craft room, etc. Marie Kondo style. I kept a trash bag and a box for garage sale items nearby, and tried to conquer one or two spaces a day. Garage sale items went into the garage, and trash went to the bin.

Much of what we removed were kids’ toys. I knew we’d never be able to keep our house clean with lots of toys available to our kids (haha), so we put pretty much everything (including the girls’ large dollhouse) in a storage unit.

We also removed quite a few pieces of furniture in order to open up our main living area and make it more walkable for people viewing it during a showing. Furniture also went into storage.

Another area we almost forgot about was the backyard. All the kid stuff (except the trampoline) was removed. I swear, we found about 47 Barbie shoes hidden in the plants. 😂

You can see the trees in our master bathroom in this old photo. I pondered removing the mirrors as well, but ended up leaving them for staging.

You can see the trees in our master bathroom in this old photo. I pondered removing the mirrors as well, but ended up leaving them for staging.

2. We took down/painted over super-specific design choices. This was a little heartbreaking to me, as I had spent many hours designing Knox’s constellation bedroom. His room had a large, dark mural on one wall that just had to go- it was much too specific of a design to appeal to a large group of buyers, AND I didn’t want to deter anyone that wasn’t willing to take it down themselves. Thankfully, my mom came over and lovingly helped me scrape all day to get the wallpaper off- not a fun job for sure.

I also had a tree design painted in our master bathroom, which I loved, but wasn’t sure many others would. I chose a neutral grey and it made the space really calm and open feeling. We did leave the girls’ floral bedroom mural in hopes that whomever bought the home might have a little girl, or just like it and want to keep it.

My favorite 60’s toile chandelier has been in our home since I stole it from my parent’s house, haha.

My favorite 60’s toile chandelier has been in our home since I stole it from my parent’s house, haha.

3. We removed fixtures we wanted to keep. We replaced a few light fixtures (like my favorite tole chandelier) with simple neutral ones that would appeal to most buyers.

4. We removed quite a few personal family photos, and some weird decor items. I guess I have a thing for body part decor? I took all these items to storage as well. We debated on whether or not to leave our family photo gallery wall, and ended up leaving it, hoping that it would help buyers visualize what they could do with the space. If we’d had more time, I would have tried putting some neutral art in the frames in place of our family photos.

“Manny” the lamp was taken to storage. We love him but understand he’s a lot to take in 😂

“Manny” the lamp was taken to storage. We love him but understand he’s a lot to take in 😂

5. We made sure it smelled good. Before and during showings, we had our diffusers running with our favorite smell. It is such a delicious fragrance, leathery, musky, but fresh. Grab some for yourself here. (It’s not in stock at the time I’m publishing this post, but I watch it often and if you follow me on Insta, I’ll let you know when it’s back! Worth the wait for sure!)

Goodbye pups. We love you but some people just aren’t into animals. :)

Goodbye pups. We love you but some people just aren’t into animals. :)

6. We got rid of any signs of a pet. Dog food, bowls, crate, dog beds and most importantly- the dogs themselves- were gone. Thankfully we were able to bring them to my parent’s house during showings.

7. We did LOTS of touch-up/clean up work. Once everything was clean, we went through and touched up several areas with paint. We also went through the house with a magic eraser- it will clean gunk off of almost any surface! I paid particular attention to anything someone might need to touch, such as doorhandles, light switches, etc.- as these things can really impact the overall impression of the house.

FFDEAE40-19AB-48CD-A9CE-57664DD1E75D.JPG

8. We invested in some new front porch decor to make a really great first impression. A new wreath, doormat, and some plants to spruce things up really did the trick. You can check out my wreath and doormat here.

9. We hired someone to help clean. After decluttering and working on getting everything staged, we were exhausted and it was so refreshing to have someone do a deep clean of our home in order to prep for showings. Worth every penny, and we are going to have her back right before we close!

10. We let in the LIGHT. This is a lesson I’ve learned photographing homes for sale. Oftentimes curtains are pulled shut and the natural light a home offers is hidden. We kept all the curtains pulled open, and let in as much light as possible. More light = more space.


We had about a week to get the house ready- since we’d already set a date for an Open House. Towards the end of the process, Shawn and I went around yelling, “We can’t let them know we SIT!” (If you don’t get reference, watch this video). Honestly, I could have spent another week working on it, but I was really proud of our home once it was all ready- even a little sad that we were leaving it!

We also made sure we had great photos, and thankfully we had some practice in that area, haha. If you are selling your home, I can’t stress enough the importance of having light and bright photos of your home done by a professional. That combined with a stellar Realtor had our home sold in just 3 days on the market. You can check out the listing photos of our home below. I hope this list has been helpful!


packing tips from your everyday cheapskate

LIFESTYLElissa-anglinComment
Blue Wood (1).png

Never have I ever….packed up an entire house…UNTIL NOW! We’ve lived in our current home (soon to be someone else’s current home, haha) for almost 7 years now- and when we moved in, it was just Shawn and I plus a toddler. So, needless to say, we’ve grown in numbers and STUFF.

I took to Instagram about a month ago, desperate for packing tips, and sure enough- the community delivered. So, I’m passing along my best tips here today!

We decided it would be best to pack quite a few things to prime our home for staging, and so we ended up packing in stages. Part 1- declutter and pack items for staging/showings, and Part 2- pack everything to move. 

Because our new home is undergoing a kitchen reno 1st thing (lots more on this soon!), we’ve chosen to put almost everything we own in a storage building, and live with my parents for a few months. We are thankful to have this option. 

Knowing that we would want to keep storage costs to a minimum, it was imperative that we get as much into boxes as possible, and pack them efficiently. When we opened the storage container we’d rented on moving day, I was skeptical as to whether or not our things would all fit- and thanks to the expert-level packing skills of our movers, Rev 7 Moving, it all fit with room to spare! We had a great experience with Rev 7- if you’re in the Lubbock area, I would highly recommend them!

Now for my tips!

R.I.P. to my signed Point of Grace posters. 😂

R.I.P. to my signed Point of Grace posters. 😂

DECLUTTER LIKE YOU ARE MARIE KONDO WITH HER PANTS ON FIRE. I know this is an obvious tip, but ya’ll- we legitimately thought we didn’t have enough “stuff” to have a whole garage sale and weeks later- low and behold- our entire garage was full of it. This is a GREAT time to rethink collections, broken things, good intentions and just move on. I ended up selling or trashing so many things that have kept my house cluttered. For a couple of weeks, I chose a closet or drawer to go through- and this really helped in both the packing process and when it was time to clean for the new owners.

KEEP THE SENTIMENTAL CONTAINED. In the process of emptying our attic, I realized I had no less than 7 large Rubbermaid containers full of my mementos from growing up. I am so thankful that my parents saved and stored these items, and honestly I’m really glad I waited until this stage of life to go through it all. Some things were easy to throw away- cards I didn’t even remember receiving (I have such a hard time throwing away notes!), duplicate newspaper clippings, dried out flowers from who knows what occasion. I told myself I wanted to condense both Shawn and I’s sentimental things into one large Rubbermaid container. It took about 2 days, but I did it. The hardest part? The emotional journey I took as I went through my life. Friends I missed, regrets I’ve let sit for years, realizing just how many people have helped and encouraged me. Whew! It was tough, but worth it. My main purpose in going through these things was to make a keepsake box for my kids. As I sorted, I considered the legacy I’m leaving- what I would want my kids to know about my life- what I considered important. And that helped me say yes or no.

HAVE A GARAGE SALE. We initially thought it would be too much hassle to do a garage sale. However, as I started to declutter, I realized that it was totally possible, and so we set a date a couple weeks in advance. This gave me plenty of time to scour the house for what we needed to sell. In the end, I’m really glad we did it- and we had a little extra cash to help cover moving expenses.

COLLECT YOUR BOXES. I am too cheap to actually pay for moving boxes, so we gathered free ones from several places. Grocery stores are always a good source for milk boxes, which are nice for small, heavy things like books. We also were able to get quite a few boxes from friends that worked in warehouses. If you look hard enough, and ask around- you’ll find them!

INVEST IN A HEAVY DUTY PACKING TAPE DISPENSER AND BUY THE GOOD TAPE. My mom and sister lent us a couple of these and they were invaluable. I also learned the importance of getting the good packing tape- 1 or 2 boxes with the cheap stuff and I wanted to throw it through the window! Here’s my favorite tape, and the dispenser I liked the best. Yes, now I have a favorite type of packing tape. Hello, adulthood.

LEARN HOW TO MAKE A CARDBOARD ENVELOPE. I started the packing process working on all my large art pieces and framed photos, as these can be tedious to pack. Instead of buying expensive boxes for these, I made my own with larger boxes and a utility knife. I WISH I had taken a photo of this- but my next tip will tell you how to start.

WRAP ART IN BLANKETS AND STRETCH WRAP. A great solution for art and photographs is to fold them up inside a blanket (you can fit several together with a layer of blanket in between), and then use stretch wrap to hold it all together. This solution was magical for us, and got all our blankets packed at the same time. Then, to finish the cardboard envelope, I cut a broken down larger box in half with a utility knife, and sandwiched the blanket-covererd-art in-between the two pieces of cardboard, always making sure that the cardboard was larger than the blanket/art. Then I taped and stretch wrapped the two pieces of cardboard together tightly so that the art could not move inside the cardboard when it was standing vertically.

Why yes, I did stretch wrap EVERYTHING. Including the inspiration board you see in the background of this photo. All the smaller pieces are pinned into some foamboard I’d mounted on the wall, so I simply took the foamboard down and wrapped it all up!

Why yes, I did stretch wrap EVERYTHING. Including the inspiration board you see in the background of this photo. All the smaller pieces are pinned into some foamboard I’d mounted on the wall, so I simply took the foamboard down and wrapped it all up!

STRETCH WRAP FOR EVERYTHING! Guys, I’m obsessed. I used the roll of stretch wrap my mom brought over so quickly that we had to go buy 2 more! Stretch wrap is so helpful for wrapping anything framed as I mentioned above, but I ended up using it in all sorts of applications. Mason jar with markers in it? Stretch wrap it. Jar full of loose change? Stretch wrap. Hardware that needs to stay with broken down furniture? Stick it in a plastic baggie and stretch wrap it to one of the pieces. I even put stretch wrap over the pot of my fiddle leaf fig so that the dirt wouldn’t fly out in transport- and it worked like a charm! You can find it at just about any local store, but be sure to grab one with a handle like this one.

Bagging up our clothing like this was so helpful!

Bagging up our clothing like this was so helpful!

CONTAIN HANGING CLOTHING IN TRASH BAGS. I loved this tip I received on Instagram. We were able to go ahead and move all of our hanging clothes to the new house, but we bagged them up inside large trash bags for moving and storage. So all we had to do to transport was lay them down in the car and hang them directly in the closet. I had considered buying some

USE STYROFOAM PLATES BETWEEN DISHES. This was a great inexpensive solution I ended up really loving for packing my dishes. The plates were the perfect layer of protection for my dishes and allowed me to fit a lot into a box.

So there you go! My top 10 tips! I hope they are helpful to you. I am also planning to post my tips for staging your home to sell- we were able to get over list price and I do think that the staging had a large part in that- so stay tuned for that! 

paper flower crown tutorial with cricut!

LIFESTYLE, CRAFTSlissa-anglin2 Comments
FlowerCrown-6424Thumbnail.jpg

The blooms in our flower bed are finally starting to appear after what feels like a very long winter- which means spring is here! The beautiful weather we’ve been experiencing has been such a beam of hope for me, as we’ve been quarantined in our home now for almost a month due to COVID-19. While I’m thankful we are healthy and home, our hands have needed something to keep us from going stir crazy!

FlowerCrown-6299-Edit.jpg

So when the new Cricut Joy arrived in the mail last week, I couldn’t wait to start making with it. I was able to check out this machine at Alt Summit last month, and you guys- it is the perfect little cutting tool!

Top Two reasons I love it:

  1. The smaller size of it makes it perfect to keep permanently on your desk. It connects to your computer via Bluetooth, so it also doesn’t use up another USB port nor does it need to be in a super close range to your computer- just close enough for Bluetooth to connect. :) It’s just cute. I love the design of it- the blue is cheerful and modern.

  2. It cuts and writes just like a larger Cricut, except it’s perfect for small jobs, like labels and cards. I know I’ve thought twice about pulling out my machine just to make a couple small labels. With the Joy, it’s already on my desktop and it’s quick and accessible. LOVE THAT convenience.

    You can check out the Cricut Joy here- they’ve put together some bundles that are perfect for label and card making!

FlowerCrown-6364-Edit.jpg

Now let’s make some flower crowns!

These are perfect for your littles, or even yourself! Of course, the flowers used in this tutorial can be made into anything you can dream up.

FlowerCrown-6311-Edit.jpg

Paper Flower Crowns

The materials needed for this project are pretty simple, and if you have a Cricut Cutting machine, you’ll likely have everything else you need in your craft closet as well.

The watercolor and watercolor paper is totally optional in this tutorial- you can easily use some of the pretty patterned paper the Cricut makes and avoid painting. I love watercolor, though- and the method I use here to paint is beginner-friendly, so don’t be intimidated!

Materials:

IMG_3095.jpg

Links to my flower files in the Cricut Design Space:

3D Daisy and Leaves

3D Peony

Check out my tutorial below!

I’d love to see your flower crowns, or any other projects you create with my flower files! Be sure to tag me @lissaanglin on any social platform so I can ooh and aah over your creations.

Lissa's Lists • Creative Mama Mother's Day Gifts

LIFESTYLE, Lissa's Lists, WISHLISTS, CRAFTSlissa-anglinComment

It’s sure to be a Mother’s Day like no other this year- and I am predicting that more than ever, most moms just want a few minutes alone! However, while we’re all safe at home, I have a feeling that those of us with crafting in our veins are itching for something to make. So, this week’s list is coming a day early- so you can go ahead and send this to whomever might be purchasing your gifts this year!

This week’s list includes a few of my all-time faves, a few things that I’m crushing on, and some of the things you guys, my community, have told me you’re wanting. There are a few great sales happening and so I’ve linked all the items right here for you- best price guaranteed!


Illustrating Bible

I get asked about my Illustrating Bible all the time, and I absolutely love it. It is a nice large size, the square shape is perfect for posting photos, the pages don’t bleed through and the spiral binding is a gamechanger. If you are wanting a journaling Bible, this is the ONE! Promise. (Psssst- also found it for 25% off at the link above).

Illustrated Faith Accessories

If you’re getting a journaling Bible, might as well go ahead and grab a few accessories. My favorites are the date stamp, cardstock and epoxy stickers- but they have a ton more!

Cricut Joy

This is a recent addition to my craft room, and I go to bed at night thinking about more projects I can do with it. :) Not joking. It is so compact and perfect to just keep out on a desk or shelf- perfect for small projects like cards and labels. I’m considering it my new label makeer!

Cricut Air 2

This is the Joy’s older, slightly more capable sister. She can pretty much do anything you want, at a larger size, and if you’ve been eyeballing one, go ahead and pull the trigger- these are priced lower than I’ve ever seen them right now!

Cricut Easy Press

You know all those cute custom shirts you see people wearing? They probably have an easy press. This little heat machine is what adheres the vinyl on to fabric and you could literally make alll sorts of things- from onesies to dishtowels to tote bags.


Water Pens

These are a favorite of mine! Perfect for newbie brush letterers, or anyone who is a little nervous about watercoloring with a brush. The water stays inside the pen, and then you dip it into color. It combines colors beautifully as well.


Iridescent Ink

Y’all, how fun are these inks?! These can be used like any paint, with a water brush, or in an alcohol ink project. A little goes a long way, so they will last a long time. I linked the set that you would REALLY want.

Iridescent Watercolors

Iridescent means they SPARKLE! This is a newer product and I am dying to test them out. I think they will be so much fun for Bible journaling!


Supply Cart

This is such a no-brainer- I am positive that everyone could use one or a few of these. I love the fact that you could pack if full of supplies and then roll it to wherever your project is happening. My heart loves a good functional gift.

Tombow Pens

FAVORITE. PENS. EVER. They’re just good, ya’ll. The dual tips are perfect when you want to brush letter and then switch to the fine tip. They have a ton of colors and I’m linking a new color palette here!


Stabilo Pens

A friend gifted these to me a few years back and I have loved them for their size and great variety of colors. These are perfect if you need a super fine tip- I use them to underline in my Bible a lot. Ples this little carrying case is so cute!

Watercolor Tin

I have this watercolor tin and love it. It’s sturdy, gives me room to mix paints, and the little containers can pop in and out so you can wash them or rotate out your colors.


Paint Pouring Kit

Am I the only one who has spent many, many minutes on the internet watching paint pouring?! Now there is a KIT you can do at HOME, guys! How fun is that?!

This post contains affiliate links, on which I will receive a small commission should you purchase anything/sign up/subscribe etc. I would never share something I didn’t actually like or want to share with you, so I wanted to let you know. Sharing affiliate links affords me a few more lattes and it’s always my aim to add value to your life with the brands and products I share. Thanks for supporting me!

Lissa's Lists • Fun Kitchen Must-Haves

LIFESTYLE, Lissa's Lists, WISHLISTSlissa-anglinComment

I’m a list lover. I’ll write to-dos down just to cross them off. Want to convince me of something? Make a list of reasons why. So, for some time now, I’ve wanted to do a fun weekly feature called Lissa’s Lists- where I get to share a fun list of whatever I feel like sharing! So, without further ado…

This week’s list is Fun Kitchen Must-Haves. I thought about calling it Quirky Kitchen Gadgets or Stuff I Have In My Kitchen That Makes Me Smile, but really, all of these things are things I would consider must haves- and they either make cooking a little easier or more fun for me- or both!


Popco Popcorn Maker

We bought this popcorn maker about 2 weeks into quarantine and have used it so much! There are tons of great recipes out there but we love this kettle corn one the best.

PackIt Freezer Bags

You could say I’m a little fanatical about this brand of bag- they contain ice packs build into the bag and fold up nice and compact to fit in your freezer when not in use. We use this for road trip snacks, soccer and baseball games and picnics. We also have several of their lunchboxes, and they make ones for breast milk as well!


Oxo Strawberry Huller

My mother-in-law gave me one of these after I watched in amazement as she used hers one day. I love strawberries and this little guy takes all the pain of getting the stem out!


Microwave Cleaner Angry Mom with Fridge Odor Absorber Cool Mom

Quite the quirky and useful pair- my mom gave me these. One is a fridge odor remover, and one fills with water and vinegar and steams your microwave clean.


Dinosaur InstaPot Steam Diverter

I mean, why not?! I bought this because I noticed that my InstaPot was steaming right onto my kitchen cabinets, but also it’s just fun. Be sure to check that it fits your specific model before you buy - they also have other characters if dinos aren’t your jam.


Brown Sugar Saver

This is a quick and cheap fix for dry brown sugar. Just soak it in water and pop it into your canister, and voila!


Square Ice Cube Trays

I love these for many reasons- good for whiskey ice, frozen coffee, homemade baby food.


Pampered Chef Mix N Chop

Another gift from my mom that I use several times a week. This little tool makes breaking up ground beef, turkey or sausage soooo much faster and easier.


Kitchen Scissors

If you don’t have a good pair of kitchen scissors, you’re working too hard!

This post contains affiliate links, on which I will receive a small commission should you purchase anything/sign up/subscribe etc. I would never share something I didn’t actually like or want to share with you, so I wanted to let you know. Sharing affiliate links affords me a few more lattes and it’s always my aim to add value to your life with the brands and products I share. Thanks for supporting me!

girls' birthday visit to the American Girl store Dallas

LIFESTYLE, TRAVELlissa-anglinComment

A few years ago my mom arrived at my house with a very special box I hadn’t seen in a long time. It looks like an old Victorian chest- woven taupe fabric edged with leather and gold buckles. Inside was a sweet memory- my Samantha doll, and all her accessories I used to love playing with years ago.

I received my Samantha doll the first year, and for many years after, my grandmother would add to her collection. She had a school desk, a watercolor set, and a beautiful party dress. I even had a dress to match one of hers. Every piece was special, and I loved reading the books that accompanied Samantha and told about her life growing up in the Victorian era.

A year or so ago, my daughters discovered my doll, which I am still a little possessive over, haha! They loved playing with her and all her special things- and I knew I wanted to get them a doll of their own from the American Girl store.

So, this year for their birthdays, we did just that! Liv and Lucy’s birthdays are 1 day apart, so it was the perfect opportunity to head to the Dallas store and celebrate! My niece Hayden Kate’s birthday is a few days before my girls’, so it worked out perfectly to celebrate all 3.

I let the girls pick out a special outfit at Target to wear, and of course they found the glitter unicorn headbands 😂. They ended up looking pretty cute! Quick photo with Dad before heading to the girls-only party.

LissaAnglin_PartofMeBlog_0067.jpg
Excited girls ready to go in!

Excited girls ready to go in!

I made advance reservations at the American Girl Bistro (I almost waited too late- call as much in advance as you can!) for brunch, and we headed to the store first thing that morning. I was so thankful that my mom, sister, and her daughter could come join the party.

We chose to forego the party option since it was just family that day, and I brought my own candles and lighter so we could sing to the girls, which worked out great. I’m still glad we made that decision, because our server ended up bringing them a birthday cupcake at the end of the meal anyway (we gave her a great tip! ;). However, there was a larger party going on near us, which happened to be for the daughter of a friend (kismet!)- and it looked like the girls were having a blast.

The menu has a set price for kids and adults, so that made budgeting easy- you can view the menu here. The food was plentiful- and good- not great- but the atmosphere was fun and staff was kind and helpful.

I had read that the Bistro has small highchairs for the dolls, and was sad that we would need to eat before shopping, so the girls wouldn’t have a doll to sit with. But we were very excited when we arrived and they had quite a few dolls to borrow for the meal. So, each of our girls got to pick a doll to sit with them. They LOVED this, and the servers even set plates and cups for the dolls, which was fun.

LissaAnglin_PartofMeBlog_0069.jpg
LissaAnglin_PartofMeBlog_0070.jpg
LissaAnglin_PartofMeBlog_0073.jpg

Once brunch was over, it was time to go downstairs and pick out a doll. I was just as excited as my girls were! I do wish that we had done a little more research before we went to the store, and perhaps picked out a doll online before we went. Having a plan on which doll each would get would have taken some of the stress out of buying 3 new dolls for our strong-willed 3, 4, and 5 year olds! But, it wasn’t too bad.

The sales people who are on the floor are very helpful, and in some of our chaos, explained to me that there are Bitty Babies, who look like actual babies, Wellie Wishers, who are 14” dolls- slightly smaller than the “norm”, American Girl dolls, who are the character dolls based in a particular time period (like my Samantha doll), and Truly Me dolls, who have a variety of different features and are made so that kids can have one that look like themselves (or not!).

The girls ended up getting the Truly Me dolls for the girls- and it was fun to find the ones with the same hair color, eye color, freckles or no freckles, etc. We also picked up a few accessory sets and extra outfits.

LissaAnglin_PartofMeBlog_0072.jpg

One of the things I think will be fun now that the girls have their own dolls is that you can bring them back to the store for a variety of services- hair styling, ear piercing- they even do real ear piercing on girls. Plus, we have an easy gift option for the next birthday/Christmas- because the accessories are endless! I love the variety and diversity that American Girl has in their products.

All in all, it was a great experience and I am sure we will be back- maybe for an Afternoon Tea and hair braiding!

LissaAnglin_PartofMeBlog_0071.jpg

ac59f5749c17286612f5d09472fd1635eedd68c328c50b2e18