Goodness, it’s been a while since I’ve done a blog post, but this HAD to be documented! We’ve finally completed the master bathroom renovation for our Anglin Abode!
When we purchased this home, we knew we’d want to do a major renovation here, and so once the kitchen was done, we started saving for the master bathroom. I’d been calling it my “dorm bathroom”, because that’s what it felt like- barely functional with little to no storage.
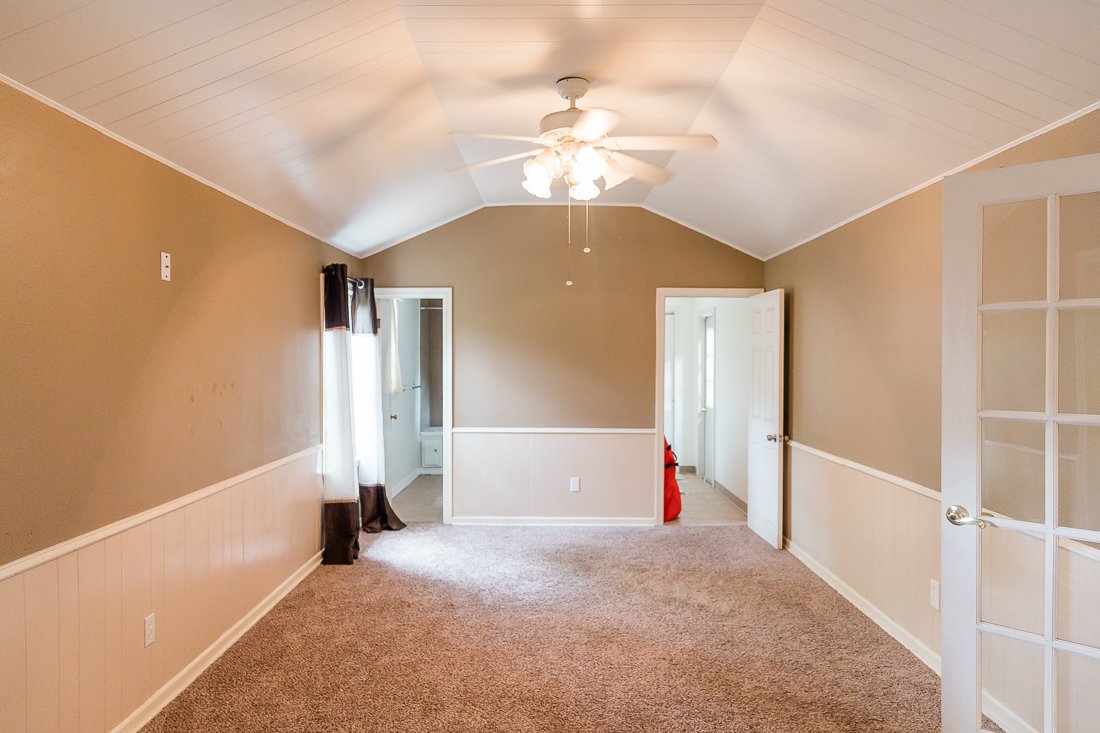
The bathroom is located at the very back of the house and was clearly a DIY add-on. It was essentially a square space that had been divided into two halves- one side being the bathroom and one being the laundry room. You can see the two doors in this old house photo below- the left is the bathroom and the right is the old laundry.
Here’s the left side- our “dorm bathroom” with basically no storage, and the toilet so close to the door I couldn’t even get it in this shot, haha!
And the other side- old laundry room. There was a door to the exterior that we ultimately decided to close in.
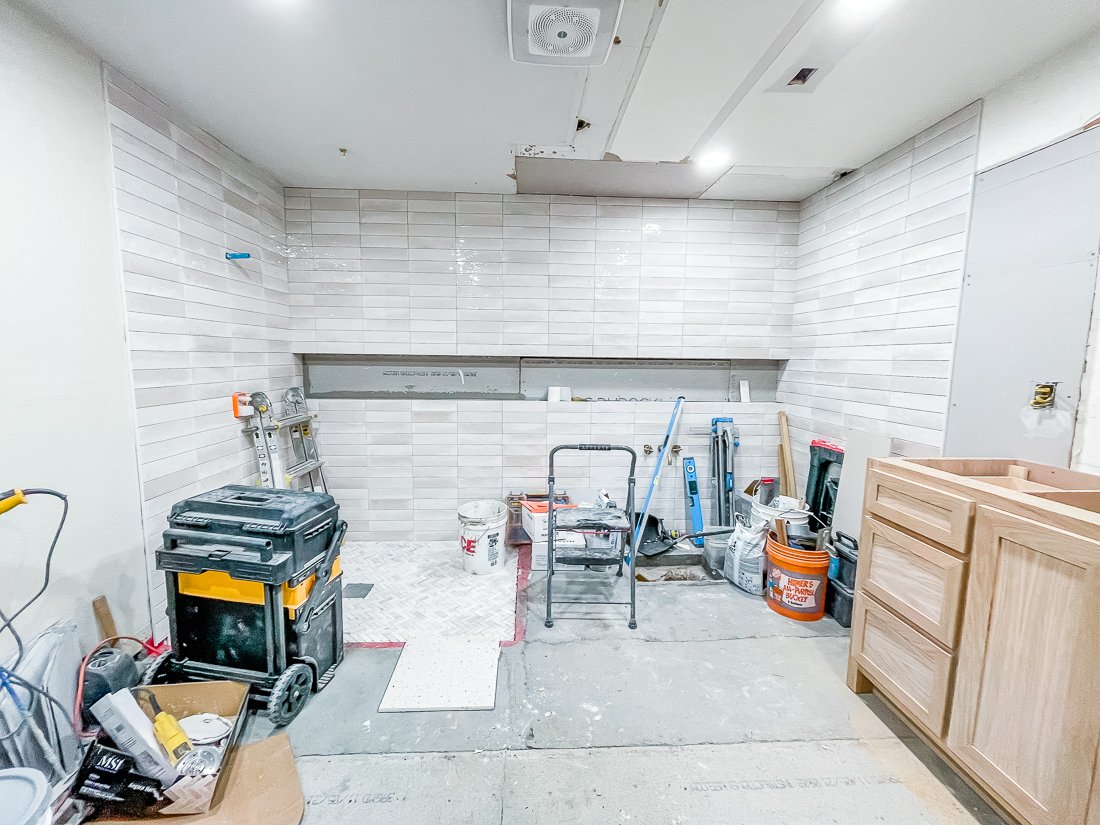
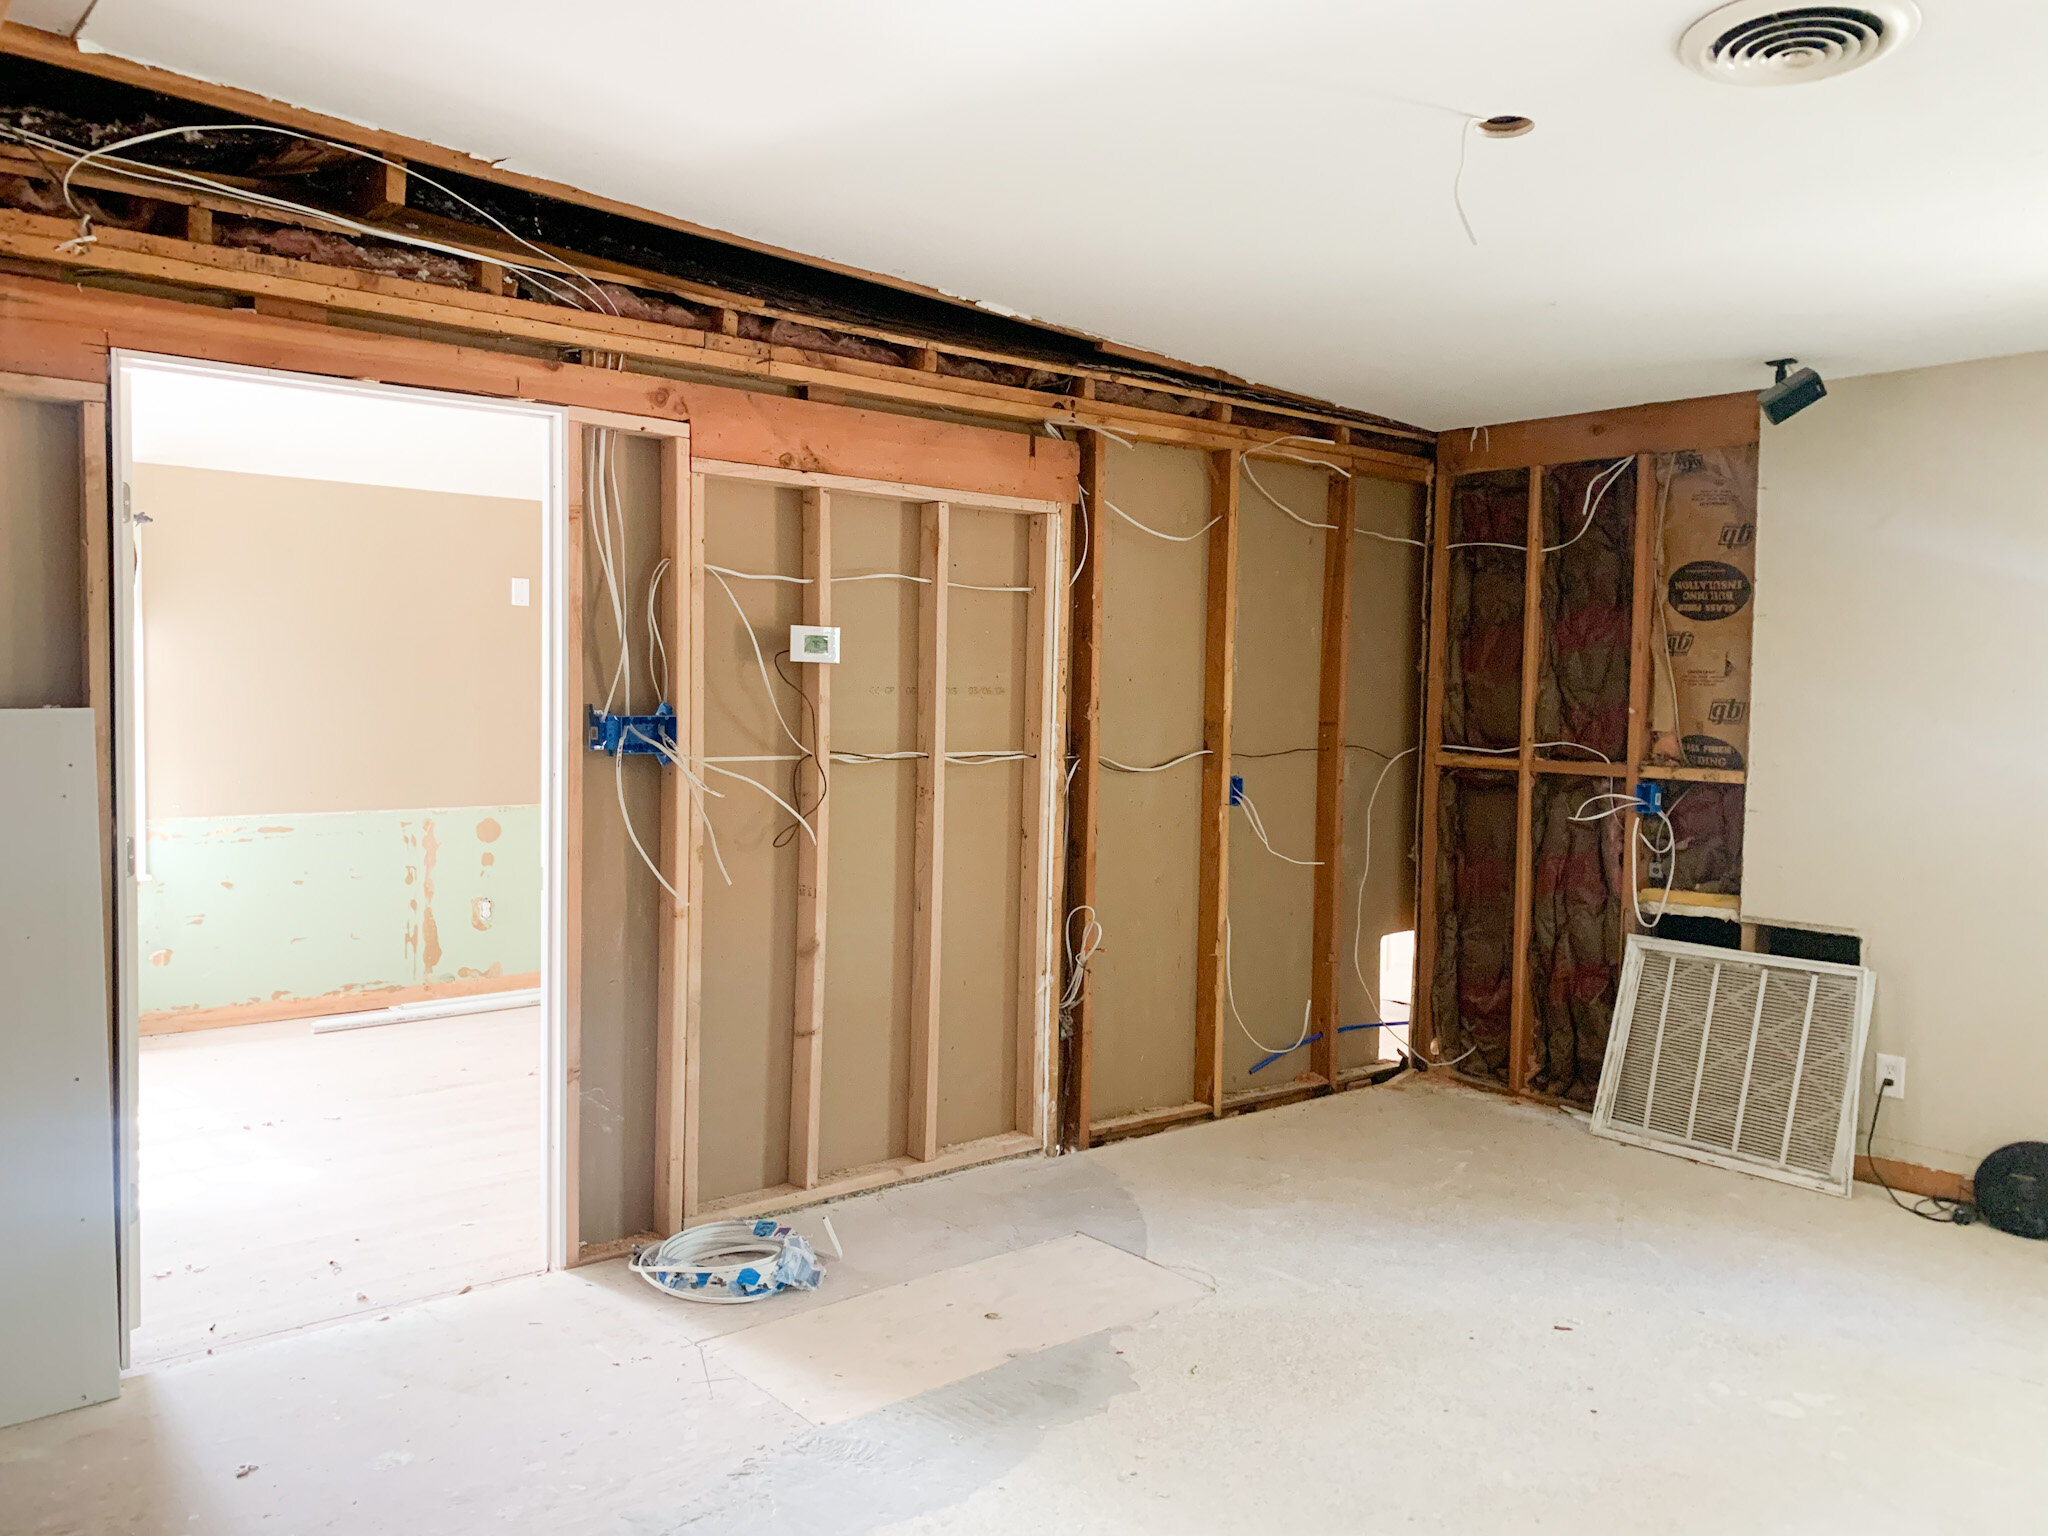
I COULD NOT WAIT to see what it looked like once that middle wall was removed. Here’s what it looked like! You can see the spot where the bathtub once was was in really bad shape, and we also had to contend with the water heater that was basically in the middle of the room.
Here is my sketch of the same wall.
In progress:
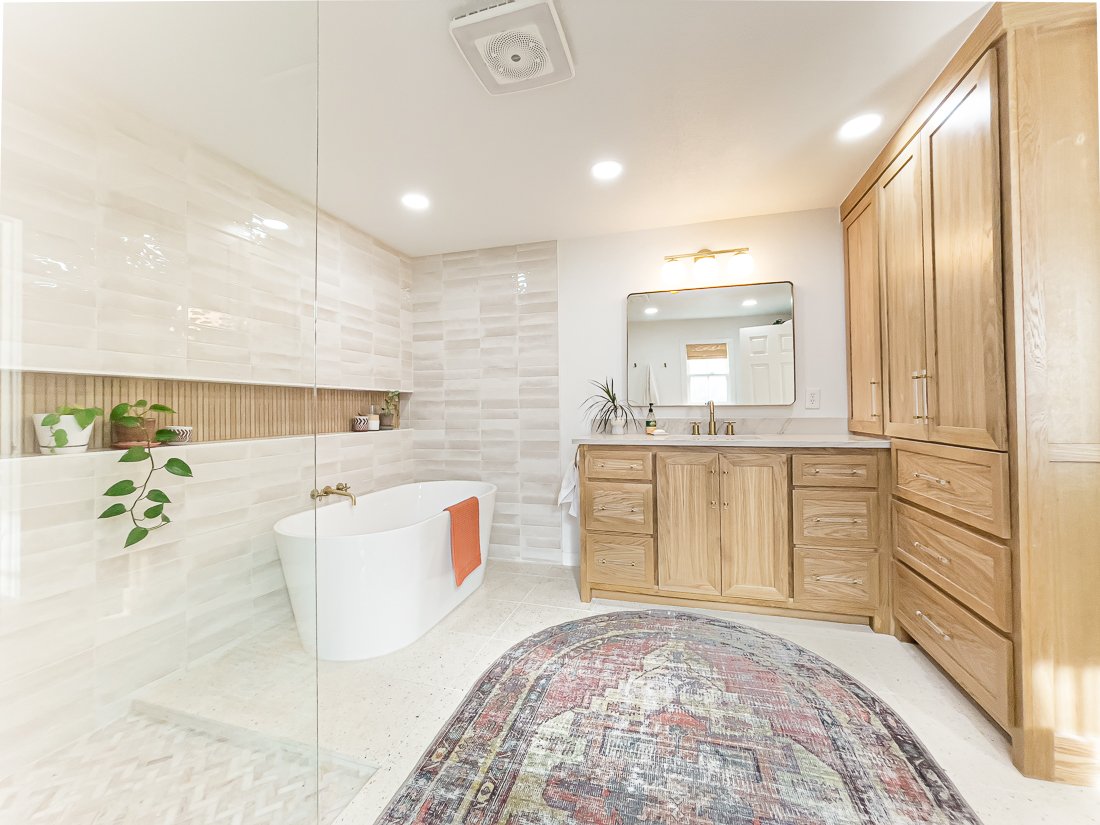
And the final!
East wall before:
My sketch:
And after!
We are so in love with the way everything turned out. The square layout of the room was the biggest challenge for me, because I was set on having this semi-open shower and tub layout.
You can see below I was trying my darndest to squeeze in 2 vanities, but we eventually decided against this in order to create a more spacious feeling in the room. I also didn’t want to compromise any of that countertop (a.k.a. curling iron) space with 3 girls in the family. Thankfully, Shawn didn’t mind and so we share a sink.
I also added in a floor-to-ceiling linen closet which was much-needed. This and the vanity gives us plenty of storage and keeps the rest of the room very open feeling.
My original design also included a curbless shower and a shower niche that extended all the way across the back wall, so that it is useful for both the shower and the tub, and adds interest to the completely tiled back wall. Our contractor eventually convinced me to add a small (it is maybe 1.5”) curb to the shower just to contain the water a bit better, and I am really happy with the way it turned out. This also meant I needed to add a 4th(!) type of tile to the design.
The large shower niche was also a bit of a challenge. Remember the huge water heater that was smack dab in the middle of this back wall? We ended up swapping it out for a tankless water heater that is located in a storage closet adjacent to this room and it was one of our more costly choices, but SO worth it. I love having hot water almost immediately when we turn on the faucet- and in this 76-year-old home that is something I don’t take for granted.
Instead of creating the shower niche inside the existing wall, our contractor essentially built a faux wall on top of the structural wall, and that allowed us to run plumbing for the bathtub and create this long niche. I love the way the horizontal line creates a steady, linear design, and place for my little plants!
Let’s talk about finishes!
I wanted our bathroom to be a very peaceful, spa-like space that would feel clean and cozy. I had tons of great inspo on my Master Bath Pinterest board, but unfortunately most of the finishes there were just way out of our budget. So, my goal was to create the same look on a budget.
I was crushing over this tile from Bedrosians, but it was just too expensive for us- so I ended up with this similar tile from Home Depot, which had the same warm white and color variation.
My biggest splurge and my favorite thing in our bathroom is the terrazzo tile floor from TileBar. I’m obsessed.
The wood-look tile in the niche is also from TileBar and was backordered for a couple of months, but it was worth the wait. It matches our white oak cabinets perfectly.
I also struggled to find the right size and type of rug that would fit this space, and was so excited when I found this WASHABLE rug! It is thin but absorbent. Because of the placement of our toilet, a rectangular shaped rug was too large- so the oval was a perfect solution.
I did not initially plan on doing natural stained cabinets, but once I realized how light everything else would be in the room, I decided it would ground the space better to keep the cabinets natural. These are white oak with a clear coat finish. I loved the acrylic and gold handles I found, too- I like that they let the wood grain shine with just a touch of the gold that runs throughout our house.
The countertop is quartzite- similar to what we have in our kitchen. I love the soft grey and how it picks up the same tones in the wall tile.
All in all, we are super pleased with the space and it functions beautifully for our family. I love that I have a peaceful little spot and that it can essentially turn into a big steam room when the shower’s running.
I will link everything I can here!
Contractor: Allure Kitchen & Bath (they were so great to work with- we already have them started on another project!)
Wall & Trim Color: Pure White by Sherwin Williams
Floor Tile • Shower Floor Tile • Shower Niche Tile • Shower Wall Tile • Vanity Light
