Lissa Anglin • Part of Me Blog

Art, décor, family and photography- it's all part of me!

Cricut projects

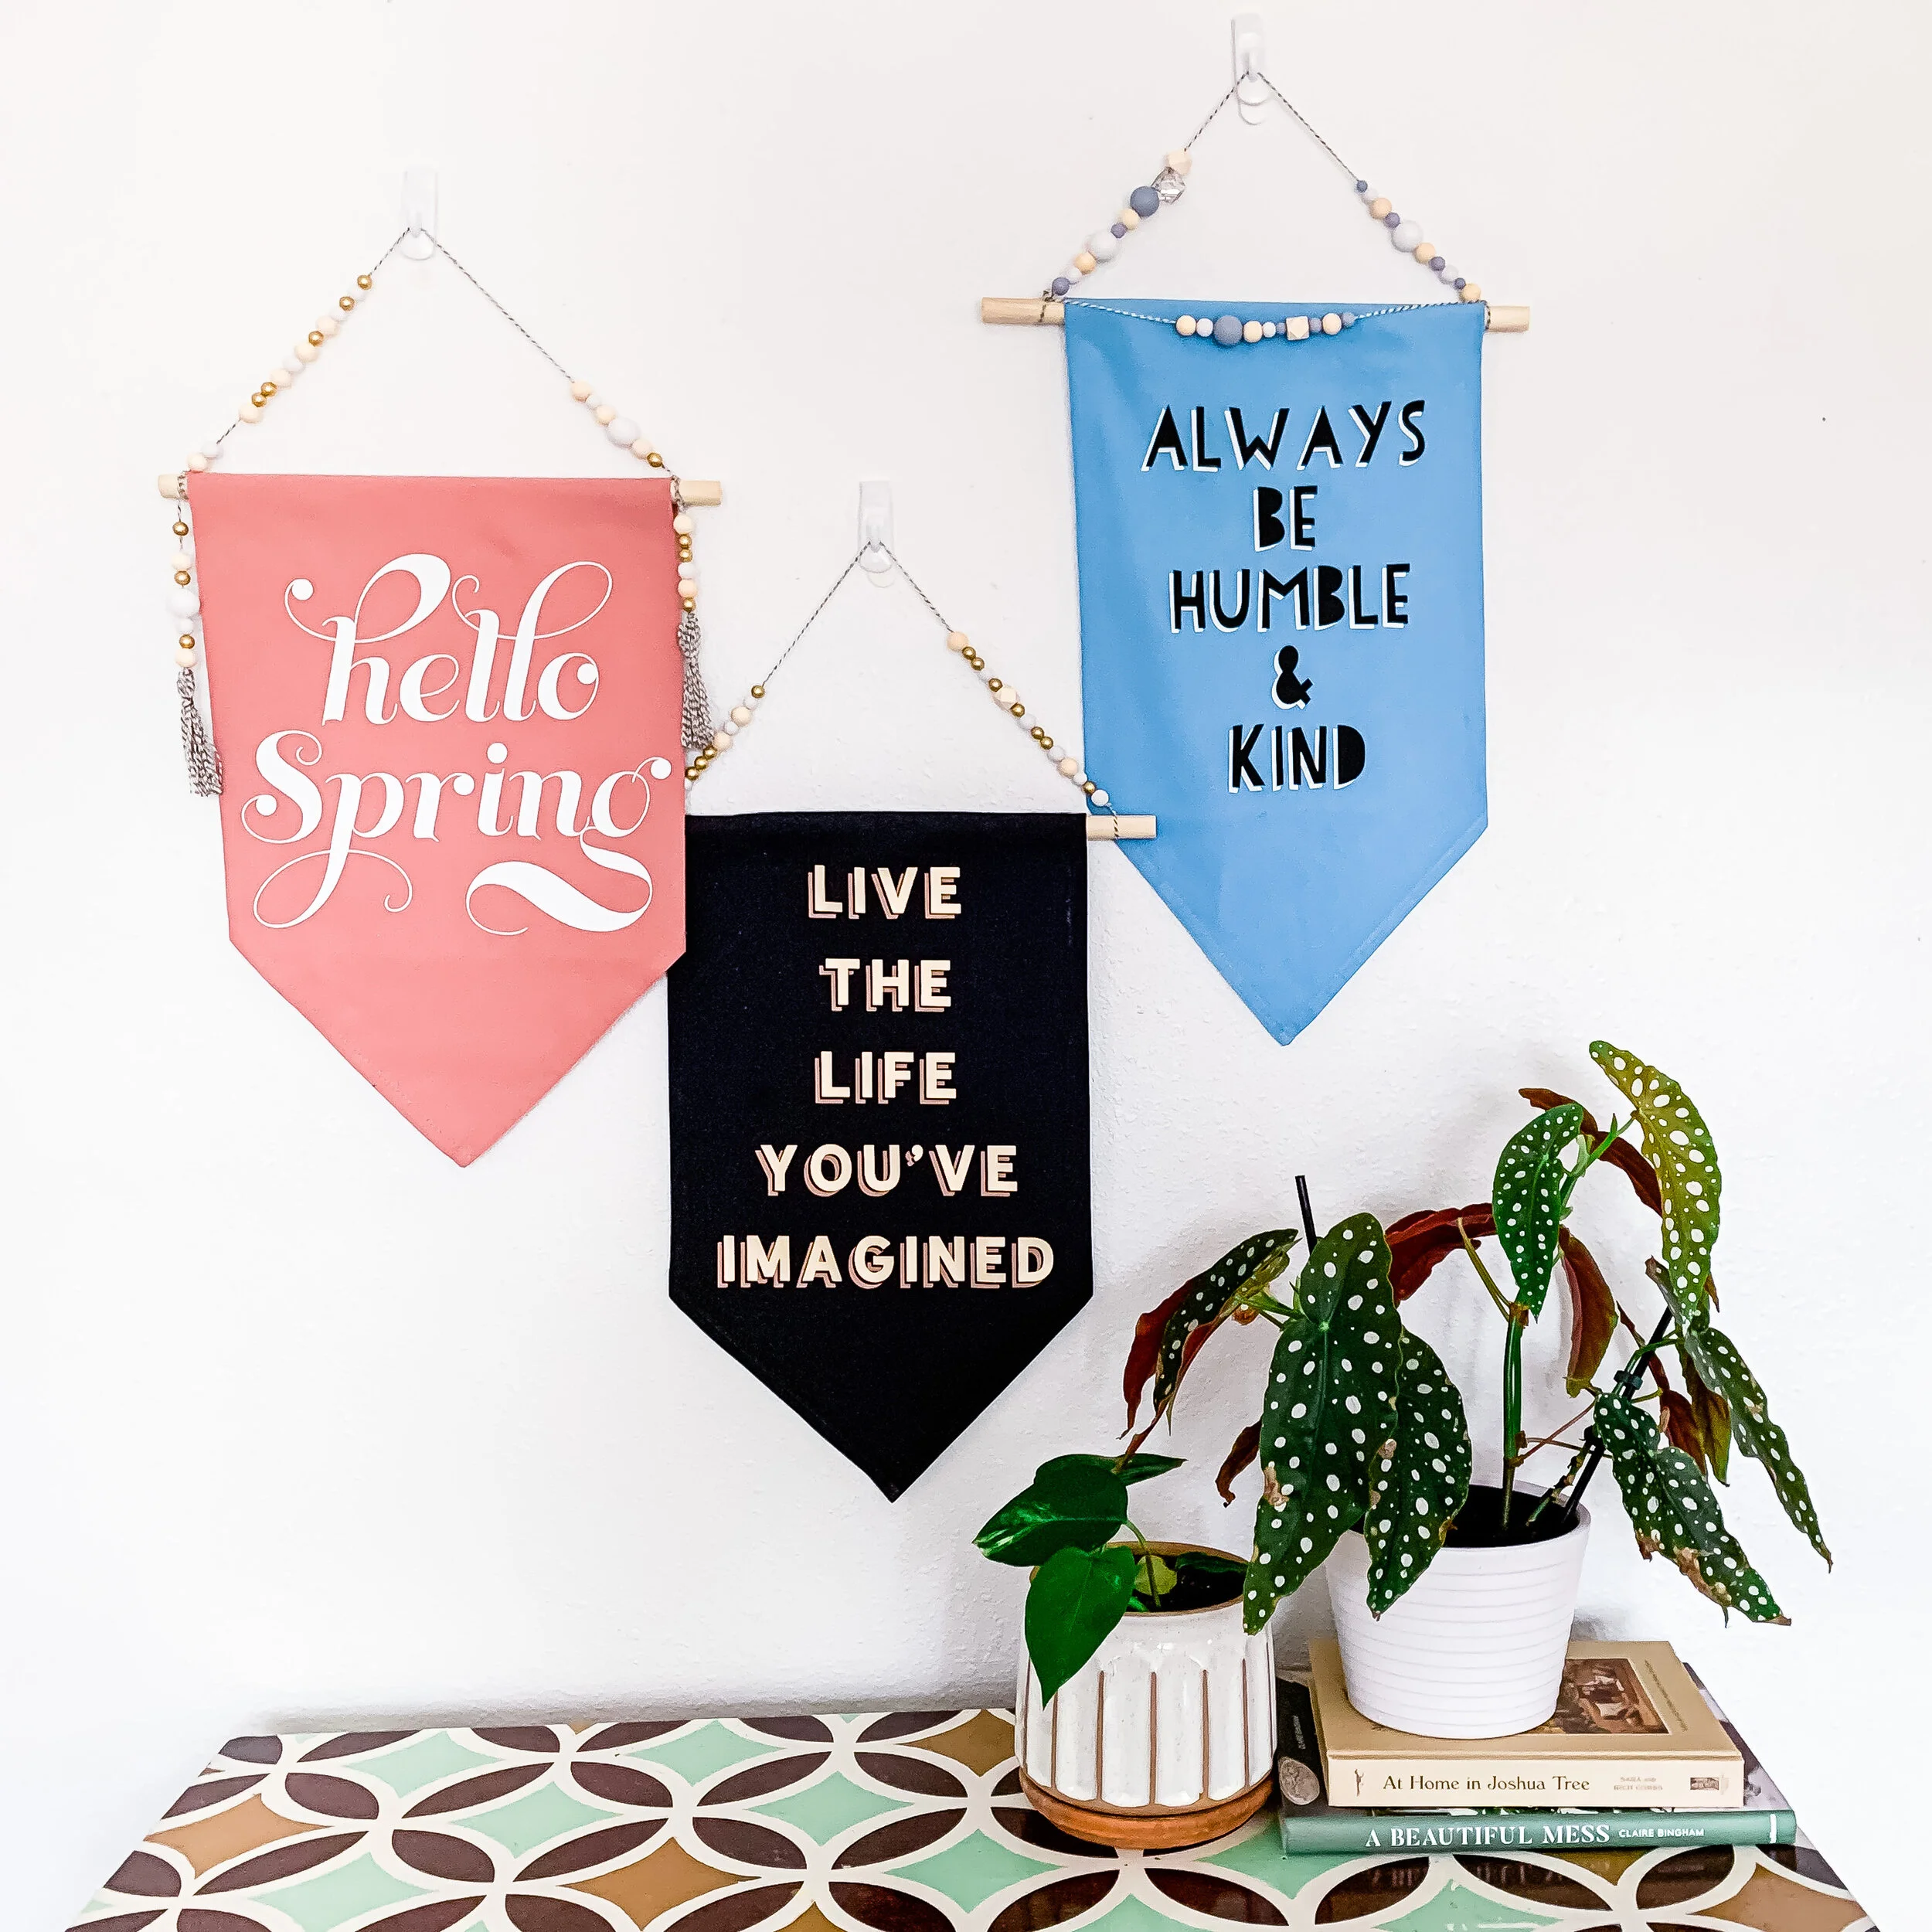
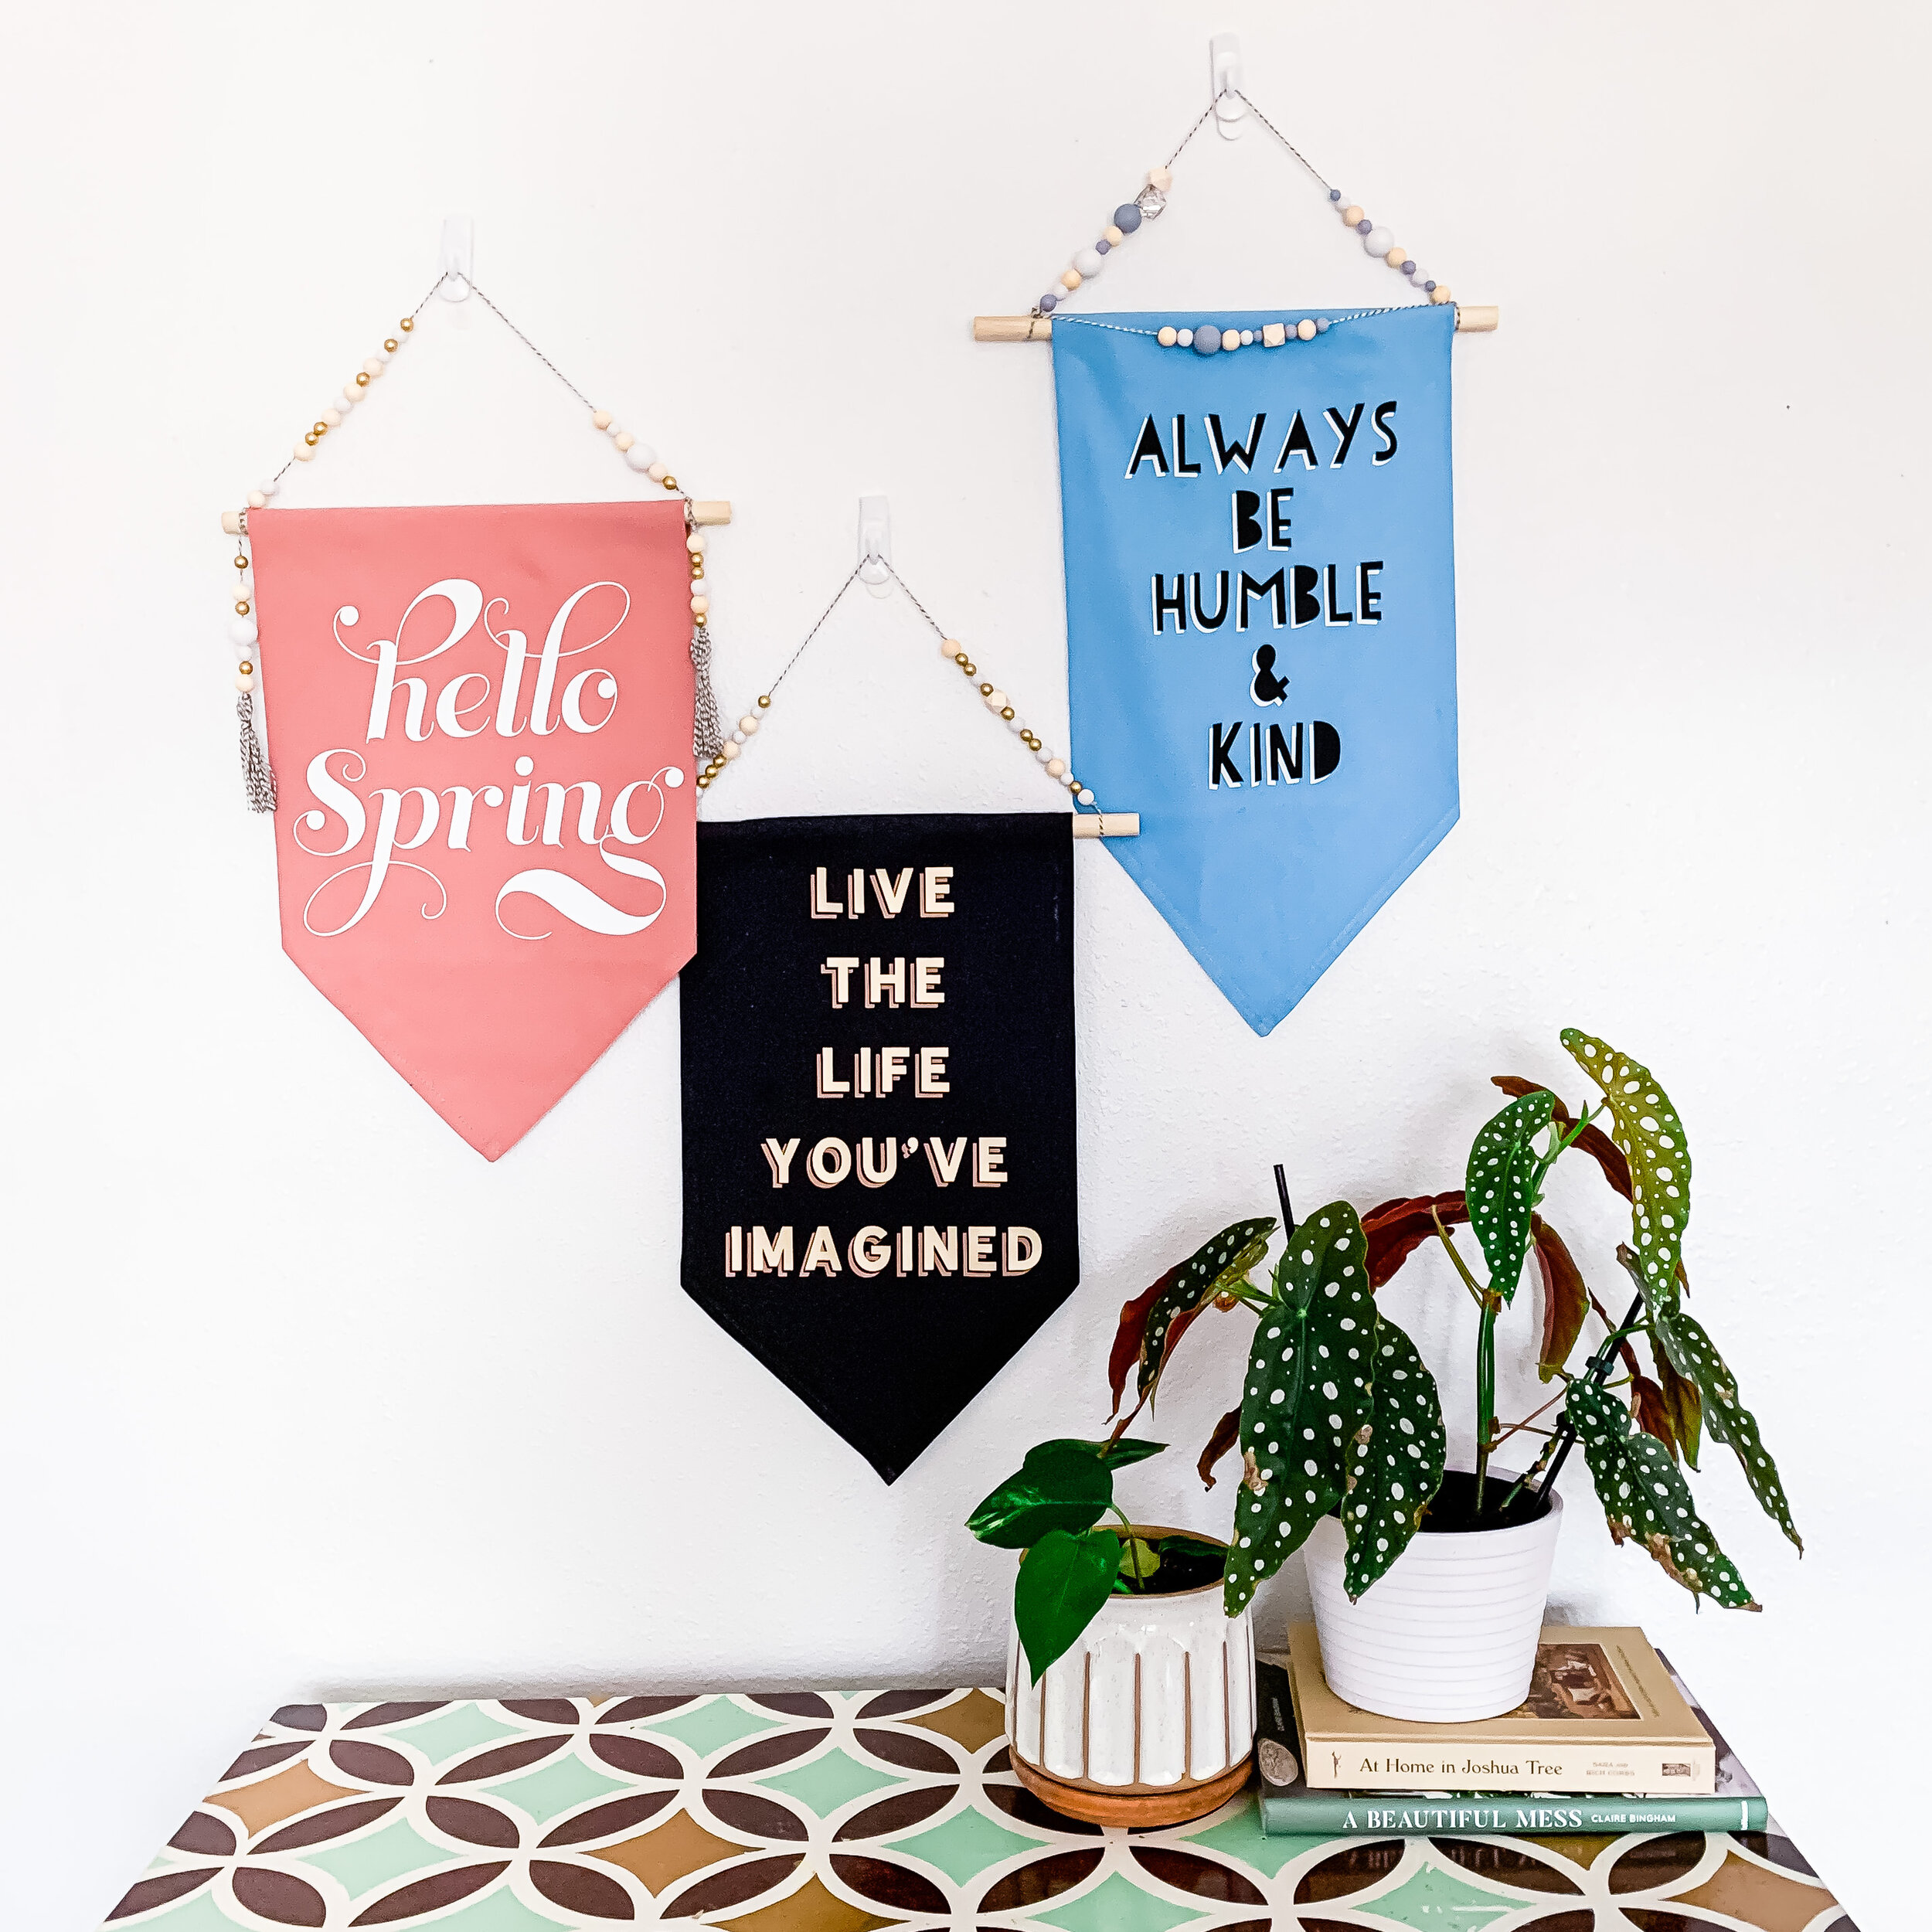
thrifted word banners made with cricut!

CRAFTS, DIY, HOMElissa-anglinComment
IMG_1354.JPG

Ya’ll, never have I had such a rollercoaster of a project. When I first pitched to Cricut that I wanted to make some cool signs for my home with thrifted pieces, I couldn’t WAIT to get started. So of course, I waited riiiight up until the last day to make them and GUESS WHAT?!? The project failed miserably.

So I tried it a little differently. FAIL. And then I tried like 3 more times before I just threw up my hands and yelled ABANDON SHIP! 😂Thankfully, I have one of the best thrift shops in town close by and so I hopped in the car and sought out some new inspiration. And like always, the thrift store delivered.

I ended up picking up some old linen napkins (you know, like your grandmother puts out at Christmas and Easter?) and making something I’m really quite proud of- these super cute NO SEW word banners.

I made these using my Cricut Air 2, Cricut iron-on, and Cricut Easy Press. If you’re a newbie to using Cricut iron-on, this would be a super fun project to start with.

The vintage linen napkins I snagged cost me a total of $3 at the thrift store. Mine were 19” square cloth napkins, but almost any scrap fabric would work for this- think tablecloths, placemats, etc. I think a pattern would make some really neat banners as well!

IMG_1343.JPG

Supplies Needed:

  • Cricut Machine- I used my Air 2, but depending on the size of your banner a Cricut Joy would work!

  • Cricut Light Grip mat

  • Cricut Easy Press

  • Cricut Easy Press Pad

  • Cricut Iron-on- I used white for “Hello Spring”, Beige for the shadow and Gold Shimmer for the main on “Life the Life”, and Black for the shadow and white for the main on “Always Be Humble & Kind”

  • Cricut Weeding tool

  • Old Linen Napkins or other fabric

  • Hot Glue Gun

  • Scissors

  • 5/8” Dowel Rod (or whatever suits the size of your banner)

  • Fabric De-fuzzer (obviously this is optional- but the napkins I bought needed it, and the iron-on wouldn’t have adhered well without a de-fuzz)

Check out this video for the full tutorial!

You can access my design files for FREE in the Cricut design space!

Always Be Humble & Kind Banner File

For this design, I used white Cricut Iron-On for the shadow and black for the main text. Click on the image to be taken to the file in design space!

IMG_1365.jpg

Hello Spring Banner

For this design, I used white Cricut Iron-On for the text. Click on the image to be taken to the file in design space!

Live The Life You’ve Imagined Banner

For this design, I used beige Cricut Iron-On for the shadow, and shimmer gold for the main letters. Click on the image to be taken to the file in design space!

I would LOVE to see your banners if you give this project a try- please tag me @lissaanglin! It was a relatively quick one, and so much fun to add the beads and twine. You could really go crazy with the extra decor- I’m thinking tassels, felt balls, buttons, flowers…you name it!
IMG_1346.JPG
CricutWordBanners4.png


More Posts Like This:

perking up my coffee bar with my cricut!

CRAFTS, DIYlissa-anglinComment

This post is sponsored by the awesome people at Cricut, who give me the freedom to create the projects I want to do, and the ability to do them well with all their amazing products.


CoffeeBar-6000.jpg

See what I did with that title?! You guys know I love a good pun.

I’ve finally finished decorating the new coffee bar area in our home- for now, anyway. :) And I couldn’t resist creating some customized coffee canisters and flavoring syrup bottles for it! To see some crazy before + afters, check out my previous post for the before + afters of this part of our #anglinabode reno.

CoffeeBar-5935-Edit.jpg

I wanted it to be an area I loved to look at and spend time in, but also highly functional as well. We do a LOT of coffee here, but we also have an ice machine and like to make fun sodas. The syrup flavorings we use for these are delicious, but I didn’t love them cluttering the countertop.

So, I was so excited when I found these inexpensive olive oil bottles at WalMart. To up the ante, I also ordered these super cool weighted spouts in a gold color.

I also wanted to pull in some gold accents to match our knobs and fixtures, so I was pumped to find these gold and clear canisters (which come in a bunch of different colors too!). They look like glass and metal, but are plastic- which is honestly much better for this clumsy crew. I also added these really cool coffee scoops to put inside the canister that also function as a bag clip.

This is a pretty simple cut and stick project, so I’ll just fill you in on all the details!

Here’s what I used for this project:

IMG_4871.jpg

Cricut Joy

Cricut Transfer Tape

Cricut Permanent Vinyl

Scraper and Weeder Tools

Cricut Joy mat (optional)

Gold Canisters

Coffee Scoops

Olive Oil Bottles

Gold Weighted Spouts

I used the font Hanley that I purchased from Creative Market. This is one of my most-used fonts and has been a great purchase for me!

I was sure to keep my font size the same throughout all of the labels. This keeps the overall look consistent and professional. Be sure to double check your measurements and make sure the longest word will still fit in the space given the font size. I alllllmost didn’t get the word “peppermint” to fit!

Here’s a quick video of the process:

Pinterest1.png

I really love the way they turned out! I’d love to see your coffee bar projects, too- be sure to tag me @lissaanglin on any social media!

This post contains affiliate links, on which I will receive a small commission should you purchase anything/sign up/subscribe etc. I would never share something I didn’t actually like or want to share with you, so I wanted to let you know. Sharing affiliate links affords me a few more lattes and it’s always my aim to add value to your life with the brands and products I share. Thanks for supporting me!